crwdns2935425:03crwdne2935425:0
crwdns2931653:03crwdne2931653:0


Unscrew cover
-
The structure is held in place by 4 screws and some friction.
-
With the drives removed, peer inside to see the two screws at the bottom of the cage. Unscrew those. You might need an extender for these two.
-
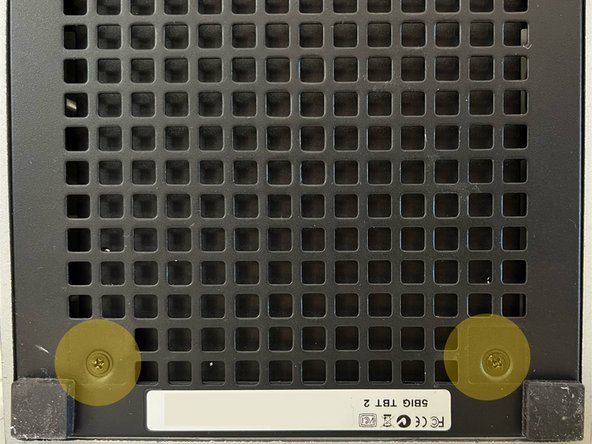
Next, put the structure upside down and take off the 2 feet at the front of the cage (the side with the blue dot).
-
You'll find two screws under there, unscrew those too.
| - | [title] |
|---|---|
| + | [title] Unscrew cover |
| [* black] The structure is held in place by 4 screws and some friction. | |
| [* black] With the drives removed, peer inside to see the two screws at the bottom of the cage. Unscrew those. You might need an extender for these two. | |
| [* black] Next, put the structure upside down and take off the 2 feet at the front of the cage (the side with the blue dot). | |
| [* black] You'll find two screws under there, unscrew those too. | |
| - | [* black] Now for some fiddling and prying: The internals can be moved away from the front. If you are still holding the structure upside down, with the dot facing towards you, you should be able to move the black parts away from the aluminum, pushing forward. I recommend prying something in between the two layers and carefully opening it up. |
| - | [* black] Keep in mind that there are two rails running on the inside (you can see them if you peer inside the cage). You will have to follow the same direction. |
| - | [* black] After a while, you should be able to slide it open. |
crwdns2944171:0crwdnd2944171:0crwdnd2944171:0crwdnd2944171:0crwdne2944171:0