crwdns2935425:06crwdne2935425:0
crwdns2931653:06crwdne2931653:0

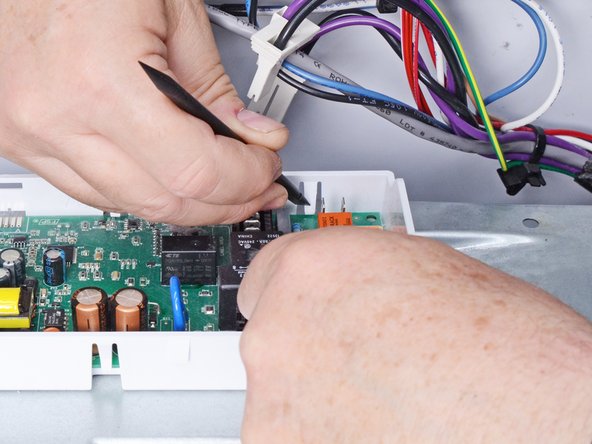


Release the main board
-
Lift the board with one hand and use the other to release each clip with a spudger.
crwdns2944171:0crwdnd2944171:0crwdnd2944171:0crwdnd2944171:0crwdne2944171:0