crwdns2933423:0crwdne2933423:0

Whirlpool-droger – Het testen en vervangen van het verwarmingselement

crwdns2936315:0crwdne2936315:0
crwdns2936313:0crwdne2936313:0
crwdns2931653:015crwdne2931653:0
Whirlpool Dryer Heating Element Testing and Replacement, Remove the heater housing cover: crwdns2935265:00crwdnd2935265:01crwdnd2935265:03crwdne2935265:0 Whirlpool Dryer Heating Element Testing and Replacement, Remove the heater housing cover: crwdns2935265:00crwdnd2935265:02crwdnd2935265:03crwdne2935265:0 Whirlpool Dryer Heating Element Testing and Replacement, Remove the heater housing cover: crwdns2935265:00crwdnd2935265:03crwdnd2935265:03crwdne2935265:0
Remove the heater housing cover
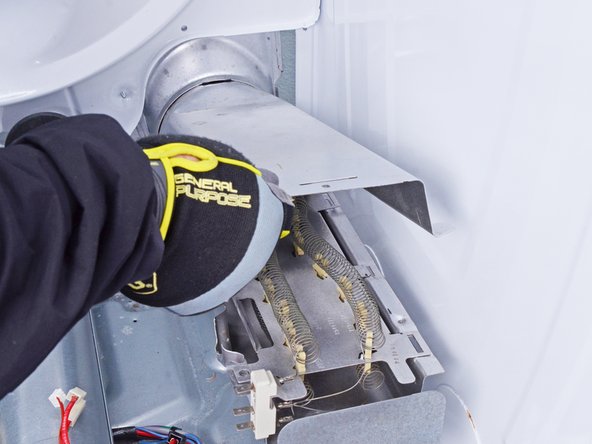
  • Put on gloves before continuing, as the heater housing cover is sharp.

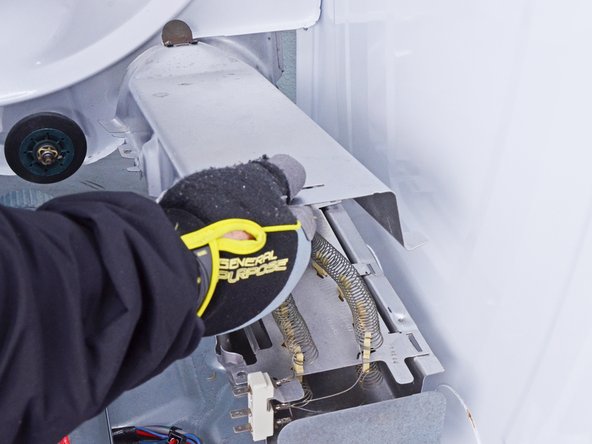
  • Lift the front of the heater housing cover to release the tabs securing it to the inlet housing pipe.

  • Make sure to lift the end of the cover well up so that you can get this tab to come free. Also the tabs on the side of the housing can stick in the slots.

  • Remove the heater housing cover.

  • During reassembly, make sure all the tabs on the cover have gone all the way through the slots on the sides of the housing and on the heating element. It will snap into place when it is correct.

We raden je aan handschoenen aan te trekken voordat je het deksel wegtrekt, aangezien die nogal scherp is.

Til de voorkant van het deksel omhoog om de klemmen die het deksel aan de pijp bevestigen los te maken.

Zorg dat je de het uiteinde van het deksel goed omhoog tilt zodat je zeker weet dat de klem los komt. Het is ook mogelijk dat de klemmen aan de zijkant van de behuizing in de sleuven blijven steken.

Verwijder het deksel.

Zorg dat je bij het weer in elkaar zetten van je toestel zeker weet dat de klemmen volledig in alle sleuven aan de zijkanten van de behuizing en in het verwarmingselement steken. Als het goed zit, klikken alle klemmen goed vast.

crwdns2944171:0crwdnd2944171:0crwdnd2944171:0crwdnd2944171:0crwdne2944171:0