crwdns2935425:015crwdne2935425:0
crwdns2931653:015crwdne2931653:0

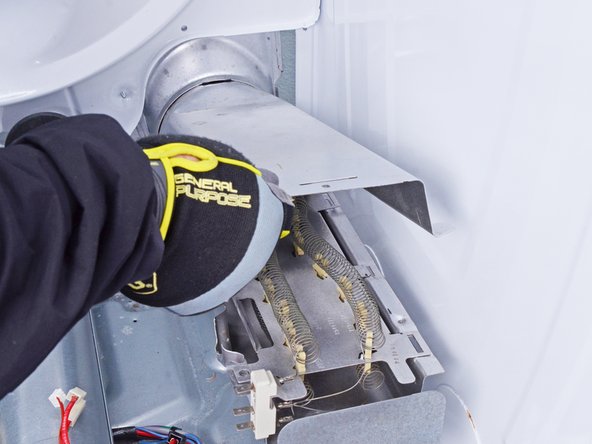
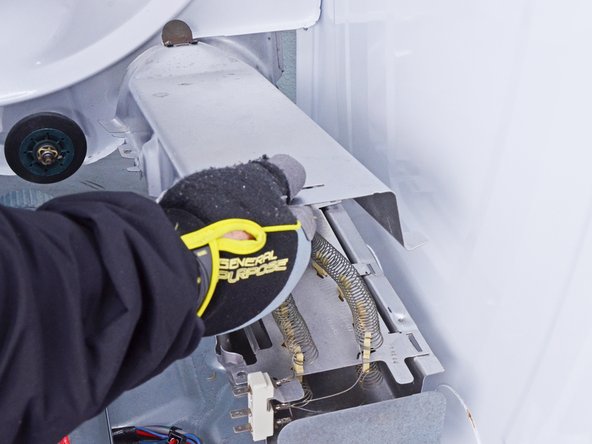


Remove the heater housing cover
-
Lift the front of the heater housing cover to release the tabs securing it to the inlet housing pipe.
-
Remove the heater housing cover.
crwdns2944171:0crwdnd2944171:0crwdnd2944171:0crwdnd2944171:0crwdne2944171:0