crwdns2933423:0crwdne2933423:0

Google Pixel 7a スクリーンの交換

crwdns2936315:0crwdne2936315:0
crwdns2936323:0crwdne2936323:0
crwdns2931653:021crwdne2931653:0
Google Pixel 7a Screen Replacement: crwdns2935265:00crwdnd2935265:01crwdnd2935265:03crwdne2935265:0 Google Pixel 7a Screen Replacement: crwdns2935265:00crwdnd2935265:02crwdnd2935265:03crwdne2935265:0 Google Pixel 7a Screen Replacement: crwdns2935265:00crwdnd2935265:03crwdnd2935265:03crwdne2935265:0
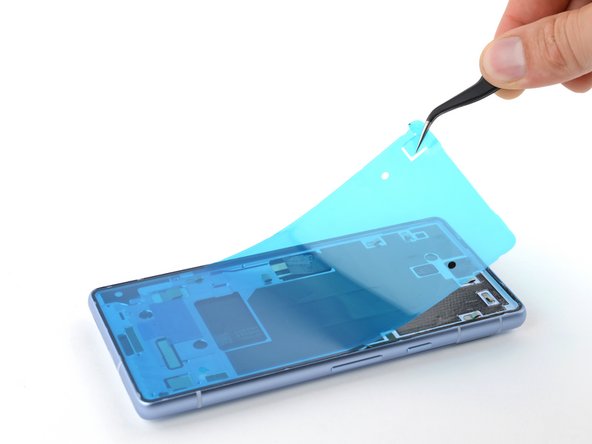
  • Grab the blue liner pull tab in the upper left corner.

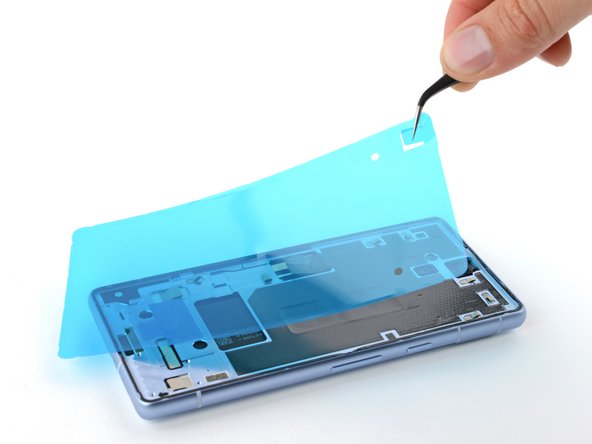
  • Slowly peel and remove the liner.

  • If the adhesive starts to peel up with the liner, check that you’ve pushed all of it into place with your spudger. If it continues to peel up, hold it down with the point of your spudger as you go.

左上にある青いライナーのプルタブをピンセットで摘みます。

ゆっくりとライナーを剥がします。

接着剤自体がライナーと一緒にはがれ始めたら、スパッジャーで接着剤をフレームに対して押し込み、しっかりと装着しているか確認してください。それでもはがれそうな場合は、スパジャーの先で押さえながら作業を進めてください。

crwdns2944171:0crwdnd2944171:0crwdnd2944171:0crwdnd2944171:0crwdne2944171:0