crwdns2933423:0crwdne2933423:0

Retrait ensemble écran Microsoft Surface Laptop 3 15"

crwdns2931529:0crwdnd2931529:0crwdnd2931529:0crwdnd2931529:04crwdnd2931529:0crwdne2931529:0

crwdns2936315:0crwdne2936315:0
crwdns2936317:0crwdne2936317:0
crwdns2931653:07crwdne2931653:0
Microsoft Surface Laptop 3 15" Display Assembly Removal, Remove four hinge screws: crwdns2935265:00crwdnd2935265:01crwdnd2935265:03crwdne2935265:0 Microsoft Surface Laptop 3 15" Display Assembly Removal, Remove four hinge screws: crwdns2935265:00crwdnd2935265:02crwdnd2935265:03crwdne2935265:0 Microsoft Surface Laptop 3 15" Display Assembly Removal, Remove four hinge screws: crwdns2935265:00crwdnd2935265:03crwdnd2935265:03crwdne2935265:0
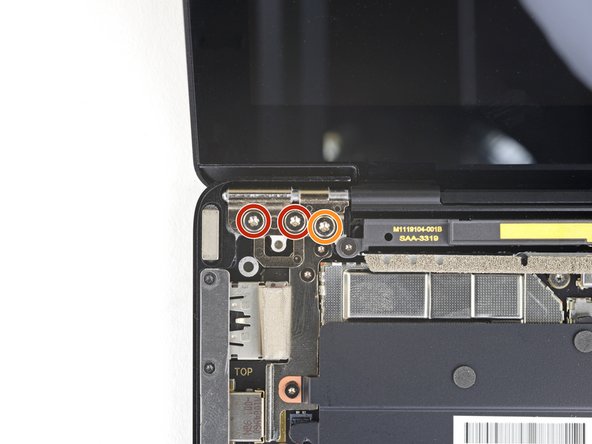
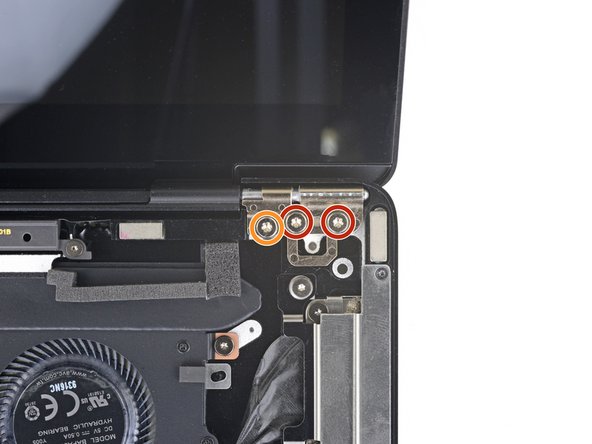
Remove four hinge screws
  • When removing the hinge screws, make sure to hold the screen steady as it will become more and more loose as the hinge screws are gradually removed.

  • While holding the screen steady, use a T6 Torx driver to remove the four outermost 5.9 mm screws securing the screen, two on each side.

  • Leave the two innermost hinge screws in place for now, one on each side.

Pendant que vous retirez les vis des charnières, veillez à bien tenir l'écran, car il deviendra de plus en plus instable au fur et à mesure que vous retirerez les vis.

Tout en tenant l'écran fermement, utilisez un tournevis Torx T6 pour retirer les quatre vis Torx de 5,9 mm externes, deux de chaque côté.

Laissez les deux vis internes des charnières en place pour l'instant, une de chaque côté.

crwdns2944171:0crwdnd2944171:0crwdnd2944171:0crwdnd2944171:0crwdne2944171:0