crwdns2933423:0crwdne2933423:0

Nokia G42 5G Vervanging van de oplaadpoortmodule

crwdns2931527:0crwdnd2931527:0crwdnd2931527:0crwdnd2931527:0crwdne2931527:0

crwdns2935425:06crwdne2935425:0

crwdns2936315:0crwdne2936315:0
crwdns2936313:0crwdne2936313:0
crwdns2931653:06crwdne2931653:0
Nokia G42 5G Charging Port Assembly Replacement, Remove the rubber gaskets: crwdns2935265:00crwdnd2935265:01crwdnd2935265:03crwdne2935265:0 Nokia G42 5G Charging Port Assembly Replacement, Remove the rubber gaskets: crwdns2935265:00crwdnd2935265:02crwdnd2935265:03crwdne2935265:0 Nokia G42 5G Charging Port Assembly Replacement, Remove the rubber gaskets: crwdns2935265:00crwdnd2935265:03crwdnd2935265:03crwdne2935265:0
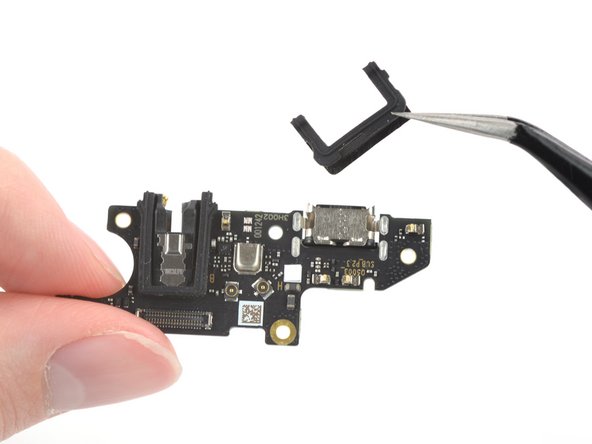
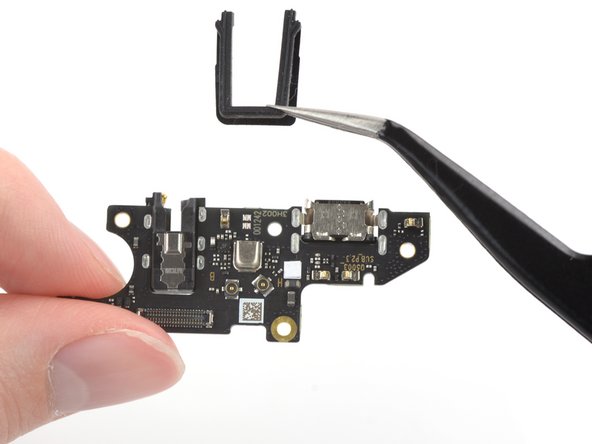
Remove the rubber gaskets
  • Use a pair of tweezers to remove the two black U-shaped rubber gaskets from the charging port and the headphone jack.

  • Only the charging port assembly remains.

  • During reassembly, transfer the rubber gaskets to the replacement board before securing it back into the frame.

Gebruik een pincet om de twee zwarte, U-vormige, rubberen pakkingen van de oplaadpoort en de audiojackingang te verwijderen.

Zorg dat je deze pakkingen bij het weer in elkaar zetten van het toestel overzet naar het nieuwe moederbord voordat je het moederbord in het toestel plaatst.

Enkel de oplaadpoortmodule blijft over.

[title] Remove the rubber gaskets
[* black] Use a pair of tweezers to remove the two black U-shaped rubber gaskets from the charging port and the headphone jack.
+[* black] Only the charging port assembly remains.
[* icon_reminder] During reassembly, transfer the rubber gaskets to the replacement board before securing it back into the frame.
-[* black] Only the charging port assembly remains.

crwdns2944171:0crwdnd2944171:0crwdnd2944171:0crwdnd2944171:0crwdne2944171:0