crwdns2931529:0crwdnd2931529:0crwdnd2931529:0crwdnd2931529:012crwdnd2931529:0crwdne2931529:0
crwdns2935425:01crwdne2935425:0
crwdns2931653:01crwdne2931653:0

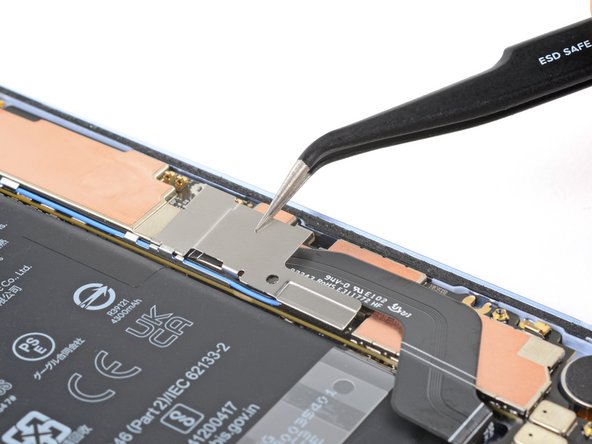
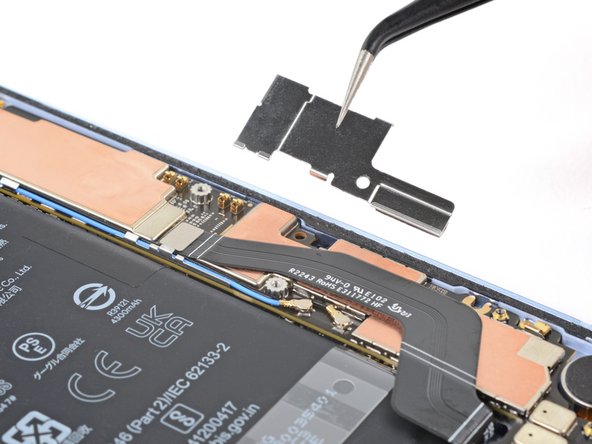


Remove the connector cover
-
Use your 1IP Torx Plus driver to remove the 1.5 mm screw securing the connector cover.
-
Use tweezers or your fingers to remove the cover.
| [title] Remove the connector cover | |
| - | [* red] Use your |
| + | [* red] Use your 1IP Torx Plus driver to remove the 1.5 mm screw securing the connector cover. |
| [* black] Use [product|IF145-020|tweezers] or your fingers to remove the cover. | |
| [* icon_reminder] During reassembly, place the [link|https://guide-images.cdn.ifixit.com/igi/uVutZyV13dYObIgC.huge|upper left corner of the cover|new_window=true] under the hook on the logic board before installing its screw. |
crwdns2944171:0crwdnd2944171:0crwdnd2944171:0crwdnd2944171:0crwdne2944171:0