crwdns2935425:010crwdne2935425:0
crwdns2931653:010crwdne2931653:0


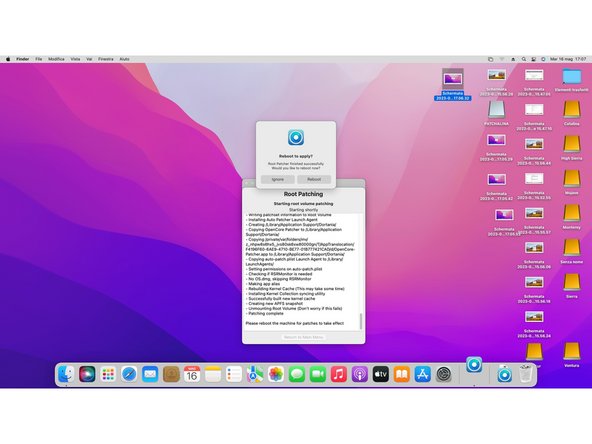


Post Install Root Patch
-
OpenCore will ask you to relaunch as root. Select yes.
-
Then OpenCore will start patching your MacOS installation to make it compatible with your Mac.
-
After it finish to patch, it will ask you to reboot apply patches.
-
While your Mac reboots, hold down the [option] key to enter again boot disk selection. From there, select again EFI Boot and your Mac will start normally.
crwdns2944171:0crwdnd2944171:0crwdnd2944171:0crwdnd2944171:0crwdne2944171:0