crwdns2933423:0crwdne2933423:0

Comment installer macOS Sonoma sur un Mac non pris en charge

crwdns2936315:0crwdne2936315:0
crwdns2936317:0crwdne2936317:0
crwdns2931653:010crwdne2931653:0
How to Install macOS Sonoma on Unsupported Macs, Post Install Root Patch: crwdns2935265:00crwdnd2935265:01crwdnd2935265:03crwdne2935265:0 How to Install macOS Sonoma on Unsupported Macs, Post Install Root Patch: crwdns2935265:00crwdnd2935265:02crwdnd2935265:03crwdne2935265:0 How to Install macOS Sonoma on Unsupported Macs, Post Install Root Patch: crwdns2935265:00crwdnd2935265:03crwdnd2935265:03crwdne2935265:0
Post Install Root Patch
  • OpenCore will ask you to relaunch as root. Select yes.

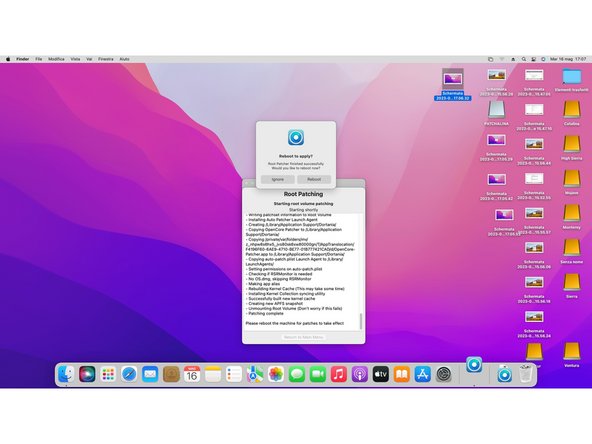
  • Then OpenCore will start patching your MacOS installation to make it compatible with your Mac.

  • After it finish to patch, it will ask you to reboot apply patches.

  • Be sure you still have the second USB you created plugged in, or you won't be able to start your pc yet.

  • While your Mac reboots, hold down the [option] key to enter again boot disk selection. From there, select again EFI Boot and your Mac will start normally.

OpenCore vous demandera de redémarrer en tant que root (superutilisateur). Sélectionnez oui.

Ensuite, OpenCore commencera à patcher votre installation MacOS pour la rendre compatible avec votre Mac.

Après avoir terminé d'installer les correctifs, il vous demandera de redémarrer pour appliquer les correctifs.

Assurez-vous que la deuxième clé USB que vous avez créée est toujours branchée, sinon vous ne pourrez pas démarrer votre ordinateur.

Pendant que votre Mac redémarre, maintenez la touche [option] enfoncée pour entrer à nouveau dans la sélection du disque de démarrage. À partir de là, sélectionnez à nouveau "EFI Boot" et votre Mac démarrera normalement.

crwdns2944171:0crwdnd2944171:0crwdnd2944171:0crwdnd2944171:0crwdne2944171:0