crwdns2933423:0crwdne2933423:0

Ecovacs Deebot 920 Reassembly

crwdns2936315:0crwdne2936315:0
crwdns2936323:0crwdne2936323:0
crwdns2931653:06crwdne2931653:0
Ecovacs Deebot 920 Reassembly, Install The Left Wheel Well: crwdns2935265:00crwdnd2935265:01crwdnd2935265:03crwdne2935265:0 Ecovacs Deebot 920 Reassembly, Install The Left Wheel Well: crwdns2935265:00crwdnd2935265:02crwdnd2935265:03crwdne2935265:0 Ecovacs Deebot 920 Reassembly, Install The Left Wheel Well: crwdns2935265:00crwdnd2935265:03crwdnd2935265:03crwdne2935265:0
Install The Left Wheel Well
  • Installing the wheel wells is the most time consuming portion of the task. Be sure to take your time, and be careful not to damage any wires.

  • Depress the spring to the left wheel well housing and push the wheel inside of it, keeping tension on the spring. Ensure that the spring rests on the wheel bushing.

  • The wheel wells are marked L and R on the front portion of the top of the housing.

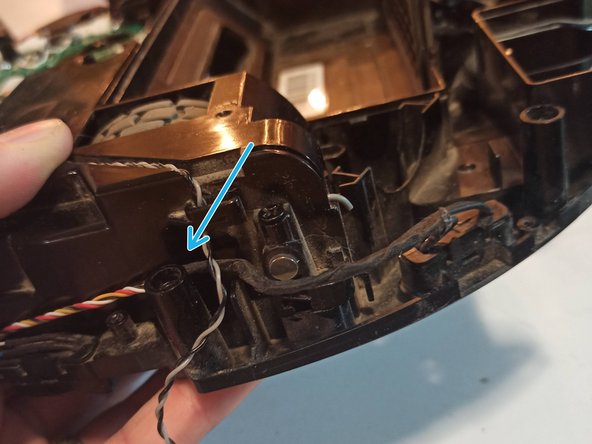
  • Move the sensor wires running along the outside of the case up and over the screw peg temporarily.

  • Ensure that the rubber grommet which routes power to the wheel motors is positioned in its half-moon seat. This grommet is located towards the front center of the unit.

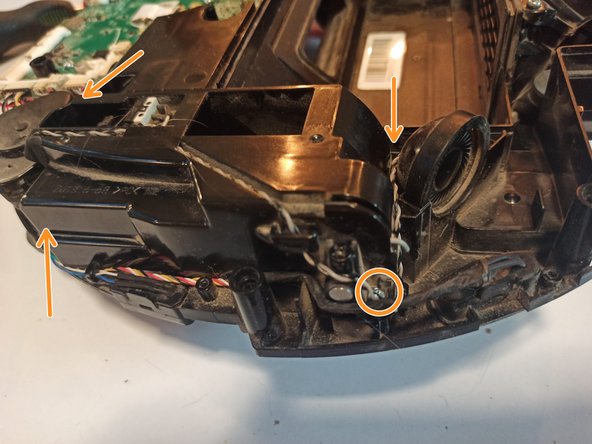
  • Seat the wheel well into position, and, while still applying pressure to the wheel, install two silver 10mm screws into opposing corners of the housing.

  • Ensure that no wires have become trapped.

  • Install the final two silver 10mm screws.

crwdns2935429:0crwdne2935429:0

crwdns2935429:0crwdne2935429:0

crwdns2935429:0crwdne2935429:0

crwdns2935429:0crwdne2935429:0

crwdns2935429:0crwdne2935429:0

crwdns2935429:0crwdne2935429:0

crwdns2935429:0crwdne2935429:0

crwdns2935429:0crwdne2935429:0

crwdns2944171:0crwdnd2944171:0crwdnd2944171:0crwdnd2944171:0crwdne2944171:0