crwdns2933423:0crwdne2933423:0

MacBook Pro 16インチ 2023 ロジックボードとヒートシンクの交換

crwdns2931529:0crwdnd2931529:0crwdnd2931529:0crwdnd2931529:07crwdnd2931529:0crwdne2931529:0

crwdns2936315:0crwdne2936315:0
crwdns2936323:0crwdne2936323:0
crwdns2931653:027crwdne2931653:0
MacBook Pro 16" 2023 Logic Board and Heatsink Removal: crwdns2935265:00crwdnd2935265:01crwdnd2935265:03crwdne2935265:0 MacBook Pro 16" 2023 Logic Board and Heatsink Removal: crwdns2935265:00crwdnd2935265:02crwdnd2935265:03crwdne2935265:0 MacBook Pro 16" 2023 Logic Board and Heatsink Removal: crwdns2935265:00crwdnd2935265:03crwdnd2935265:03crwdne2935265:0
  • The HDMI port, SDXC port, and the fins along the top of the heatsink hold the logic board tight to the frame.

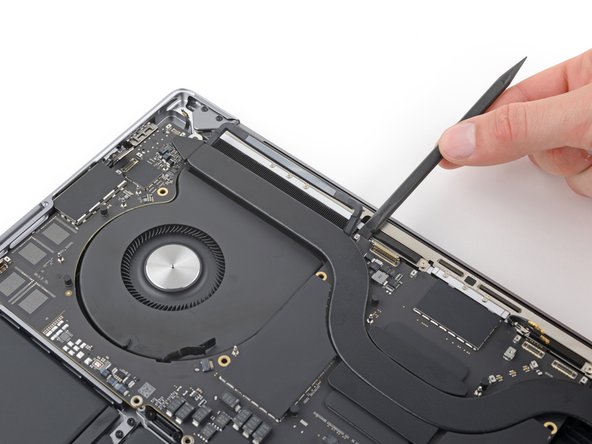
  • Insert your spudger between the middle of the top edge of the logic board and the frame.

  • Gently pry up until the fins along the top of the heatsink begin to lift from their recess in the frame.

  • The heatsink fins may catch on the left rubber gasket. Hold the gasket out of the way as you lift the heatsink, if necessary.

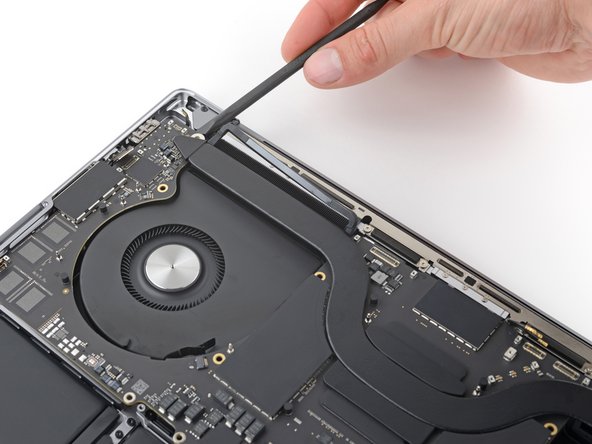
  • Insert your spudger at the top left edge of the logic board and pry it up over the left fan.

HDMIポート、SDXCポート、そしてヒートシンク上部のフィンが、ロジックボードをフレームにしっかりと固定します。

ロジックボードの上端中央とフレームの間にスパッジャーを差し込みます。

ヒートシンク上部のフィンがフレームの凹みから浮き上がるまで、ゆっくりとこじ開けます。

ヒートシンクのフィンが左側のゴム製ガスケットに引っかかる可能性があります。必要であれば、ヒートシンクを持ち上げる際にガスケットを邪魔にならないように持ちます。

ロジックボードの左上端にスパッジャーを差し込み、左ファンの上にこじ上げます。

crwdns2944171:0crwdnd2944171:0crwdnd2944171:0crwdnd2944171:0crwdne2944171:0