crwdns2933423:0crwdne2933423:0

How to Apply Thermal Paste in Your Microsoft Surface Laptop 5

crwdns2931529:0crwdnd2931529:0crwdnd2931529:0crwdnd2931529:022crwdnd2931529:0crwdne2931529:0

crwdns2935425:01crwdne2935425:0

crwdns2936315:0crwdne2936315:0
crwdns2936325:0crwdne2936325:0
crwdns2931653:01crwdne2931653:0
How to Apply Thermal Paste in Your Microsoft Surface Laptop 5, Reassembly information: crwdns2935265:00crwdnd2935265:01crwdnd2935265:03crwdne2935265:0 How to Apply Thermal Paste in Your Microsoft Surface Laptop 5, Reassembly information: crwdns2935265:00crwdnd2935265:02crwdnd2935265:03crwdne2935265:0 How to Apply Thermal Paste in Your Microsoft Surface Laptop 5, Reassembly information: crwdns2935265:00crwdnd2935265:03crwdnd2935265:03crwdne2935265:0
Reassembly information
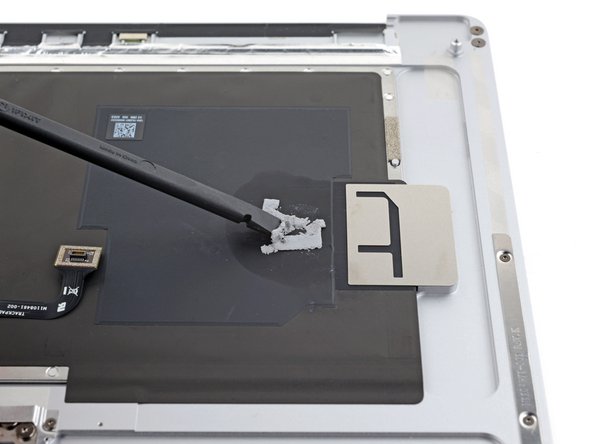
  • Your SSD has thermal paste that forms a bond to the upper case.

  • During reassembly:

  • Use the flat end of your spudger to scrape away old thermal paste from the top of the SSD and the underside of the upper case.

  • Apply a few drops of highly-concentrated isopropyl alcohol (over 90%) to the SSD and upper case. Wipe away the residue using a lint-free or microfiber cloth.

  • Replace the thermal pad with one that's the same size as the SSD sticker.

  • Alternatively, you can apply a bead of thermal paste directly to the SSD's label. Use the dot method with a bead slightly larger than the screw head securing the SSD.

crwdns2935429:0crwdne2935429:0

crwdns2935429:0crwdne2935429:0

crwdns2935429:0crwdne2935429:0

crwdns2935429:0crwdne2935429:0

crwdns2935429:0crwdne2935429:0

crwdns2935429:0crwdne2935429:0

crwdns2944171:0crwdnd2944171:0crwdnd2944171:0crwdnd2944171:0crwdne2944171:0