crwdns2933423:0crwdne2933423:0

Reemplazo de batería del iPad Air de quinta generación

crwdns2936315:0crwdne2936315:0
crwdns2936331:0crwdne2936331:0
crwdns2931653:06crwdne2931653:0
iPad Air 5th Generation Battery Replacement, Separate the lower battery cell: crwdns2935265:00crwdnd2935265:01crwdnd2935265:03crwdne2935265:0 iPad Air 5th Generation Battery Replacement, Separate the lower battery cell: crwdns2935265:00crwdnd2935265:02crwdnd2935265:03crwdne2935265:0 iPad Air 5th Generation Battery Replacement, Separate the lower battery cell: crwdns2935265:00crwdnd2935265:03crwdnd2935265:03crwdne2935265:0
Separate the lower battery cell
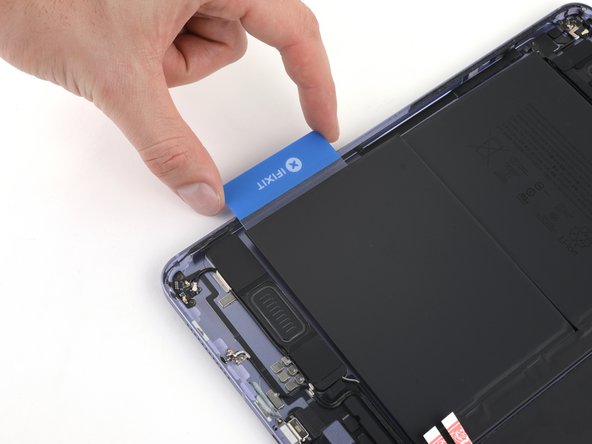
  • Insert your plastic card under the short edge of the lower battery cell to slice the adhesive.

  • Don't puncture or bend the battery. If it feels stuck, apply a few more drops of isopropyl alcohol or apply a heated iOpener to the back of the frame.

  • Insert the plastic card again under the long edge of the lower battery cell to slice the remaining adhesive.

  • Twist your plastic card to lift the short edge of the battery cell from the frame.

  • Don't try to remove the battery yet—it's still connected to the battery board.

Inserta la tarjeta de plástico debajo del borde corto de la celda inferior de la batería para retirar el adhesivo.

No perfores ni dobles la batería. Si la notas atascada, aplica unas gotas más de alcohol isopropílico o un iOpener caliente en la parte trasera del marco.

Inserta la tarjeta de plástico de nuevo debajo del borde largo de la celda inferior de la batería para retirar el adhesivo restante.

Gira la tarjeta de plástico para separar el borde corto de la celda de la batería del marco.

No intentes retirar la batería todavía; sigue conectada a la placa.

crwdns2944171:0crwdnd2944171:0crwdnd2944171:0crwdnd2944171:0crwdne2944171:0