crwdns2933423:0crwdne2933423:0

iPad Air (5. Generation) Akku tauschen

crwdns2936315:0crwdne2936315:0
crwdns2936319:0crwdne2936319:0
crwdns2931653:06crwdne2931653:0
iPad Air 5th Generation Battery Replacement, Separate the lower battery cell: crwdns2935265:00crwdnd2935265:01crwdnd2935265:03crwdne2935265:0 iPad Air 5th Generation Battery Replacement, Separate the lower battery cell: crwdns2935265:00crwdnd2935265:02crwdnd2935265:03crwdne2935265:0 iPad Air 5th Generation Battery Replacement, Separate the lower battery cell: crwdns2935265:00crwdnd2935265:03crwdnd2935265:03crwdne2935265:0
Separate the lower battery cell
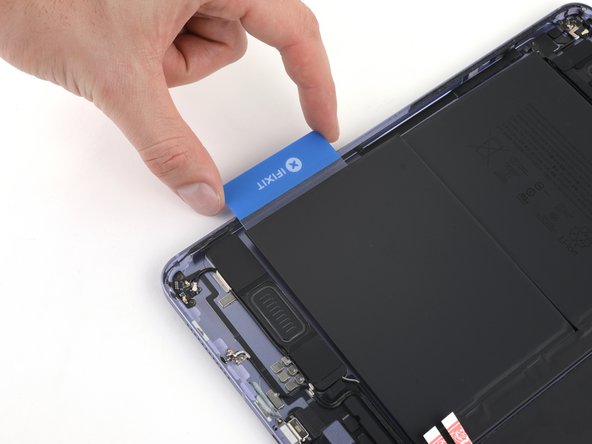
  • Insert your plastic card under the short edge of the lower battery cell to slice the adhesive.

  • Don't puncture or bend the battery. If it feels stuck, apply a few more drops of isopropyl alcohol or apply a heated iOpener to the back of the frame.

  • Insert the plastic card again under the long edge of the lower battery cell to slice the remaining adhesive.

  • Twist your plastic card to lift the short edge of the battery cell from the frame.

  • Don't try to remove the battery yet—it's still connected to the battery board.

Schiebe die Plastikkarte unter die kurze Kante der unteren Akkuzelle, um den Kleber aufzutrennen.

Achte darauf, dass die Akkuzelle nicht angestochen oder verformt wird. Wenn der Kleber zäh wird, dann tröpfle noch etwas Isopropylakohol daran oder lege einen erwärmten iOpener auf die Rückseite des Rahmens, um den Kleber wieder aufzuweichen.

Setze die Plastikkarte wieder unter die lange Kante der Akkuzell ein und trenne den restlichen Kleber auf.

Verdrehe die Plastikkarte, bis sich die kurze Kante der Akkuzelle vom Rahmen löst.

Entferne den Akku noch nicht, er ist immer noch mit der Akkuplatine verbunden.

crwdns2944171:0crwdnd2944171:0crwdnd2944171:0crwdnd2944171:0crwdne2944171:0