crwdns2933423:0crwdne2933423:0

Changement batterie iPad Air 4

crwdns2936315:0crwdne2936315:0
crwdns2936317:0crwdne2936317:0
crwdns2931653:012crwdne2931653:0
iPad Air 4 Battery Replacement, Lift the logic board: crwdns2935265:00crwdnd2935265:01crwdnd2935265:03crwdne2935265:0 iPad Air 4 Battery Replacement, Lift the logic board: crwdns2935265:00crwdnd2935265:02crwdnd2935265:03crwdne2935265:0 iPad Air 4 Battery Replacement, Lift the logic board: crwdns2935265:00crwdnd2935265:03crwdnd2935265:03crwdne2935265:0
Lift the logic board
  • Lay the iPad screen side up.

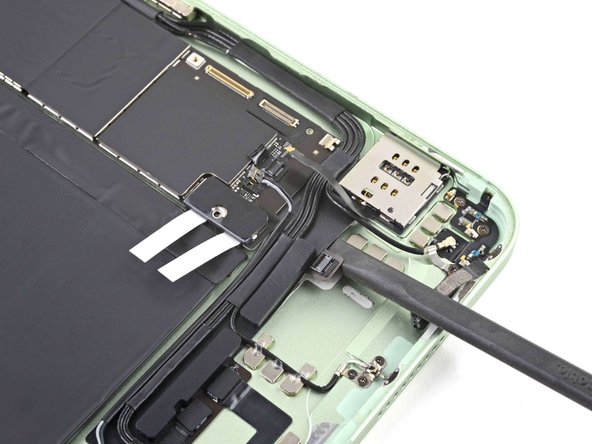
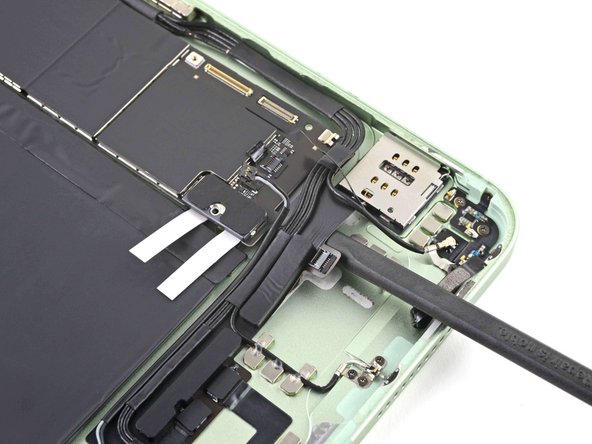
  • Slide the flat end of a spudger under the cellular wireless connector until the logic board lifts and the battery blocker card strips are loose.

  • Don't force the spudger in or pry up. If it's difficult to insert or slide the spudger, apply more heat. Alternatively, a few drops of high-strength (>90%) isopropyl alcohol may be used to soften the adhesive.

  • Leave the spudger in to prevent the adhesive from re-sealing.

Posez l'iPad avec l'écran vers le haut.

Faites glisser l'extrémité plate d'une spatule sous le connecteur de l'antenne sans fil cellulaire, jusqu'à ce que la carte mère se soulève et que les bloqueurs de la batterie se détachent.

Ne forcez pas l'insertion de la spatule ni ne faites levier vers le haut. Si vous avez du mal à insérer ou à faire glisser la spatule, appliquez plus de chaleur. Alternativement, vous pouvez utiliser quelques gouttes d'alcool isopropylique à haute concentration (> 90 %) pour ramollir l'adhésif.

Laissez la spatule en place pour éviter que l'adhésif ne se referme.

crwdns2944171:0crwdnd2944171:0crwdnd2944171:0crwdnd2944171:0crwdne2944171:0