crwdns2933423:0crwdne2933423:0

Reemplazo de batería del iPad Air 4

crwdns2936315:0crwdne2936315:0
crwdns2936331:0crwdne2936331:0
crwdns2931653:012crwdne2931653:0
iPad Air 4 Battery Replacement, Lift the logic board: crwdns2935265:00crwdnd2935265:01crwdnd2935265:03crwdne2935265:0 iPad Air 4 Battery Replacement, Lift the logic board: crwdns2935265:00crwdnd2935265:02crwdnd2935265:03crwdne2935265:0 iPad Air 4 Battery Replacement, Lift the logic board: crwdns2935265:00crwdnd2935265:03crwdnd2935265:03crwdne2935265:0
Lift the logic board
  • Lay the iPad screen side up.

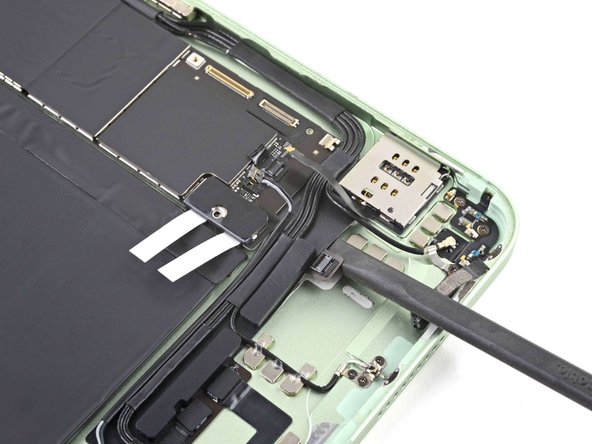
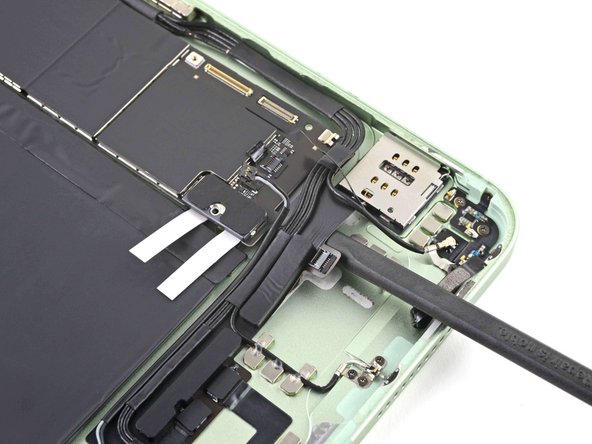
  • Slide the flat end of a spudger under the cellular wireless connector until the logic board lifts and the battery blocker card strips are loose.

  • Don't force the spudger in or pry up. If it's difficult to insert or slide the spudger, apply more heat. Alternatively, a few drops of high-strength (>90%) isopropyl alcohol may be used to soften the adhesive.

  • Leave the spudger in to prevent the adhesive from re-sealing.

Coloca la pantalla del iPad hacia arriba.

Desliza el extremo plano de un spudger debajo del conector inalámbrico celular hasta que la placa lógica se levante y las tiras de la tarjeta bloqueadora de batería estén sueltas.

No fuerces el spudger hacia adentro ni hagas palanca. Si te resulta difícil insertar o deslizar el spudger, aplica más calor. Alternativamente, se pueden usar unas gotas de alcohol isopropílico de alta resistencia (>90%) para ablandar el adhesivo.

Deja el spudger adentro para evitar que el adhesivo se vuelva a sellar.

crwdns2944171:0crwdnd2944171:0crwdnd2944171:0crwdnd2944171:0crwdne2944171:0