crwdns2933423:0crwdne2933423:0

Comment remplacer l'adhésif de votre Google Pixel 6

crwdns2931527:0crwdnd2931527:0crwdnd2931527:0crwdnd2931527:0crwdne2931527:0

crwdns2936315:0crwdne2936315:0
crwdns2936317:0crwdne2936317:0
crwdns2931653:05crwdne2931653:0
How to Replace the Adhesive for Your Google Pixel 6, Apply the adhesive: crwdns2935265:00crwdnd2935265:01crwdnd2935265:03crwdne2935265:0 How to Replace the Adhesive for Your Google Pixel 6, Apply the adhesive: crwdns2935265:00crwdnd2935265:02crwdnd2935265:03crwdne2935265:0 How to Replace the Adhesive for Your Google Pixel 6, Apply the adhesive: crwdns2935265:00crwdnd2935265:03crwdnd2935265:03crwdne2935265:0
Apply the adhesive
  • Be very careful during this step! The adhesive is very sticky and can't be repositioned once it sticks. Misaligned adhesive can lead to an improper seal.

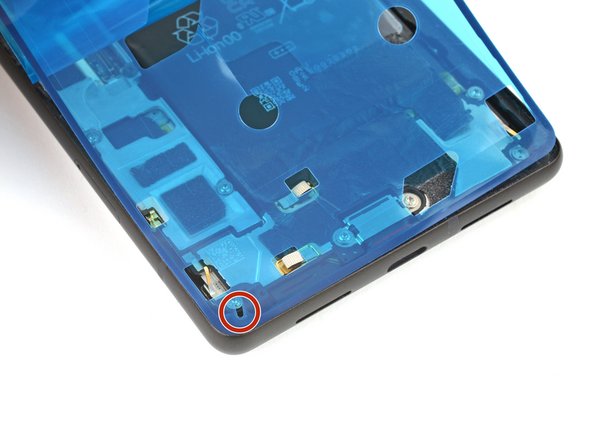
  • Lay the adhesive onto the frame, starting with the bottom or top edge. Make small corrections as you go.

  • There are holes in the bottom left and top right corners to help align the adhesive.

Soyez très prudent lors de cette étape ! L'adhésif est très collant et ne peut pas être repositionné une fois qu'il est collé. Un mauvais alignement de l'adhésif peut entraîner une mauvaise étanchéité.

Posez l'adhésif sur le châssis, en commençant par le bord inférieur ou supérieur. Effectuez de petites corrections au fur et à mesure.

Des trous sont prévus dans les coins inférieur gauche et supérieur droit pour faciliter l'alignement de l'adhésif.

crwdns2944171:0crwdnd2944171:0crwdnd2944171:0crwdnd2944171:0crwdne2944171:0