crwdns2935425:014crwdne2935425:0
crwdns2931653:014crwdne2931653:0

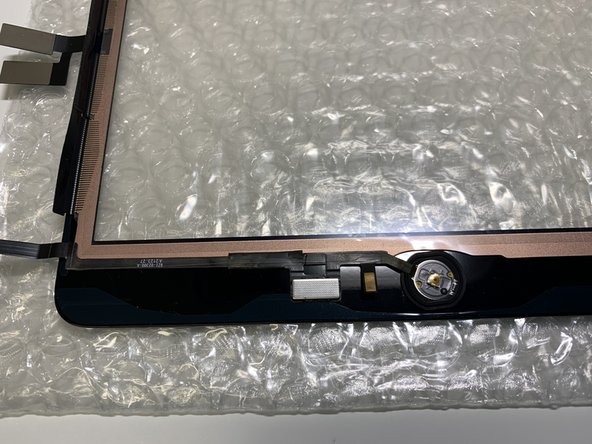


Home button installation - part #1
-
place the button in the intended place. Make sure once again that you have removed all possible dirt and particles from the glass of the previous digitizer
-
lead the cable along the edge of the digitizer layer in the left direction - parallel to the bottom edge of the screen. Whether the tape will overlap the digizer level (a layer with copper mini-wires) depends on the construction of the replacement shield itself. In the original ones there is room to leave a 0.5mm gap.
-
put the home button bracket in the right place and stick it. In the original, the braket is additionally secured with a thin layer of hot glue
crwdns2944171:0crwdnd2944171:0crwdnd2944171:0crwdnd2944171:0crwdne2944171:0