crwdns2933423:0crwdne2933423:0

Samsung Galaxy Book Pro 15" Rear Case Replacement

crwdns2931529:0crwdnd2931529:0crwdnd2931529:0crwdnd2931529:013crwdnd2931529:0crwdne2931529:0

crwdns2935425:04crwdne2935425:0

crwdns2936315:0crwdne2936315:0
crwdns2936323:0crwdne2936323:0
crwdns2931653:04crwdne2931653:0
Samsung Galaxy Book Pro 15" Rear Case Replacement, Remove the rear case: crwdns2935265:00crwdnd2935265:01crwdnd2935265:03crwdne2935265:0 Samsung Galaxy Book Pro 15" Rear Case Replacement, Remove the rear case: crwdns2935265:00crwdnd2935265:02crwdnd2935265:03crwdne2935265:0 Samsung Galaxy Book Pro 15" Rear Case Replacement, Remove the rear case: crwdns2935265:00crwdnd2935265:03crwdnd2935265:03crwdne2935265:0
Remove the rear case
  • The top edge of the rear case is lightly adhered to the frame.

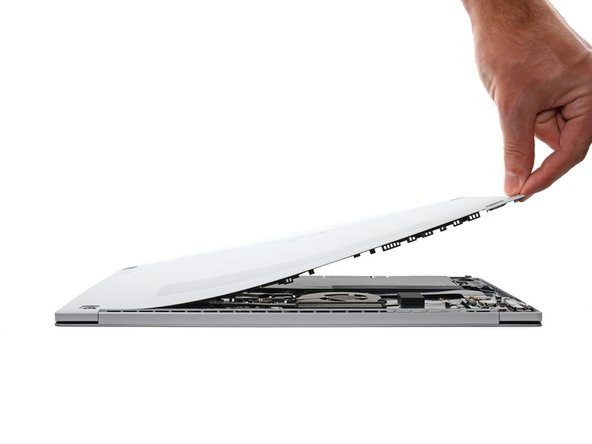
  • Pull the top of the rear case away from the frame to separate the adhesive and release the remaining clips.

  • If you're having trouble separating the adhesive, use an iOpener, hair dryer, or heat gun to soften it.

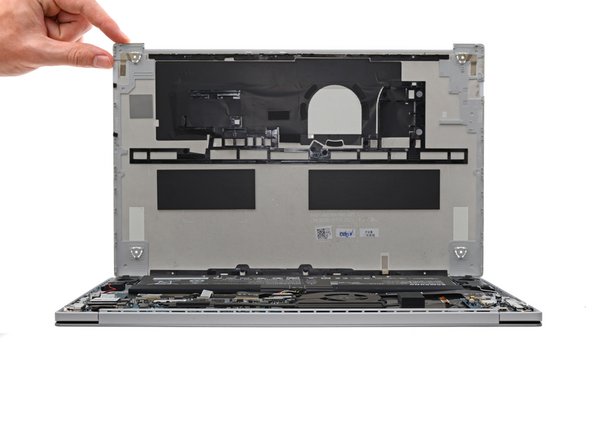
  • Remove the rear case.

  • During reassembly, perform the following:

  • If you're using a using a genuine Samsung replacement rear case, be sure to peel off any adhesive liners from the rear case before securing the top edge's clips.

  • If you're reusing your rear case, you can use some pre-cut adhesive to re-adhere the top edge if your existing adhesive is no longer sticky.

  • This is a good point to power on your laptop and test all functions before sealing it up. Be sure to power your laptop back down completely before you continue working.

crwdns2935429:0crwdne2935429:0

crwdns2935429:0crwdne2935429:0

crwdns2935429:0crwdne2935429:0

crwdns2935429:0crwdne2935429:0

crwdns2935429:0crwdne2935429:0

crwdns2935429:0crwdne2935429:0

crwdns2935429:0crwdne2935429:0

crwdns2935429:0crwdne2935429:0

crwdns2944171:0crwdnd2944171:0crwdnd2944171:0crwdnd2944171:0crwdne2944171:0