crwdns2933423:0crwdne2933423:0

Extracción de la pantalla

crwdns2931529:0crwdnd2931529:0crwdnd2931529:0crwdnd2931529:013crwdnd2931529:0crwdne2931529:0

crwdns2936315:0crwdne2936315:0
crwdns2936331:0crwdne2936331:0
crwdns2931653:012crwdne2931653:0
Screen Removal, Slice the top edge adhesive: crwdns2935265:00crwdnd2935265:01crwdnd2935265:03crwdne2935265:0 Screen Removal, Slice the top edge adhesive: crwdns2935265:00crwdnd2935265:02crwdnd2935265:03crwdne2935265:0 Screen Removal, Slice the top edge adhesive: crwdns2935265:00crwdnd2935265:03crwdnd2935265:03crwdne2935265:0
Slice the top edge adhesive
  • If the adhesive becomes hard to cut, it has most likely cooled down. Use your iOpener or heat gun for 1-2 minutes to reheat it.

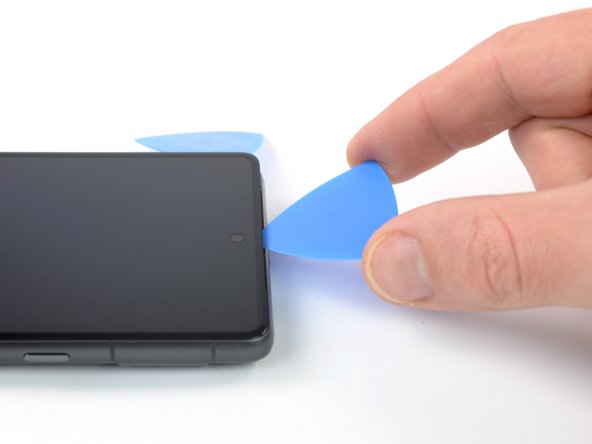
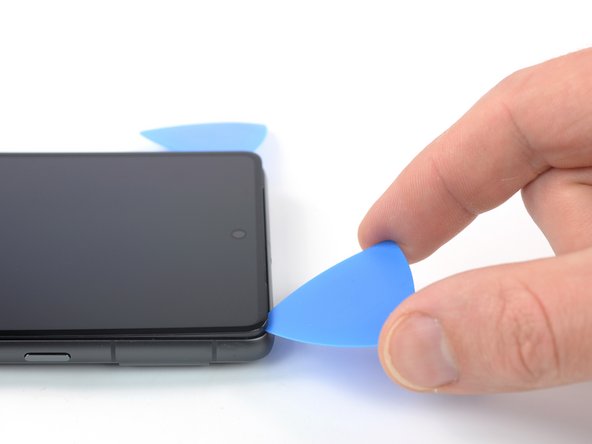
  • When you slice near the front facing camera, insert only the tip of the opening pick (~2.5 mm) to avoid damaging or smearing the camera.

  • Insert a fourth opening pick at the top left corner of the screen.

  • Slide the opening pick along the top edge of the phone to slice the adhesive.

  • Leave the opening pick in the top right corner to prevent the adhesive from resealing.

Si el adhesivo es difícil de cortar, puede que se haya enfriando. Usa tu iOpener o pistola de calor por 1-2 minutos para recalentarlo.

Cuando cortes cerca de la cámara frontal, inserta solo la punta de la púa de apertura (~2.5 mm) para evitar dañar o manchar la cámara.

Inserta una cuarta púa de apertura en la esquina superior izquierda de la pantalla.

Desliza la púa de apertura a lo largo del borde superior del teléfono para cortar el adhesivo.

Deja la púa de apertura en la esquina superior derecha para prevenir que el adhesivo re-selle.

crwdns2944171:0crwdnd2944171:0crwdnd2944171:0crwdnd2944171:0crwdne2944171:0