crwdns2933423:0crwdne2933423:0

ロジクール MX Master 3マウスフットの交換

crwdns2931529:0crwdnd2931529:0crwdnd2931529:0crwdnd2931529:04crwdnd2931529:0crwdne2931529:0

crwdns2935425:04crwdne2935425:0

crwdns2936315:0crwdne2936315:0
crwdns2936323:0crwdne2936323:0
crwdns2931653:04crwdne2931653:0
Logitech MX Master 3S Mouse Feet Replacement, Reassembly information: crwdns2935265:00crwdnd2935265:01crwdnd2935265:03crwdne2935265:0 Logitech MX Master 3S Mouse Feet Replacement, Reassembly information: crwdns2935265:00crwdnd2935265:02crwdnd2935265:03crwdne2935265:0 Logitech MX Master 3S Mouse Feet Replacement, Reassembly information: crwdns2935265:00crwdnd2935265:03crwdnd2935265:03crwdne2935265:0
Reassembly information
  • If the adhesive separated from the foot:

  • Slide the flat end of a spudger under an edge of the adhesive. If the adhesive seems stuck, you may need to heat the adhesive further.

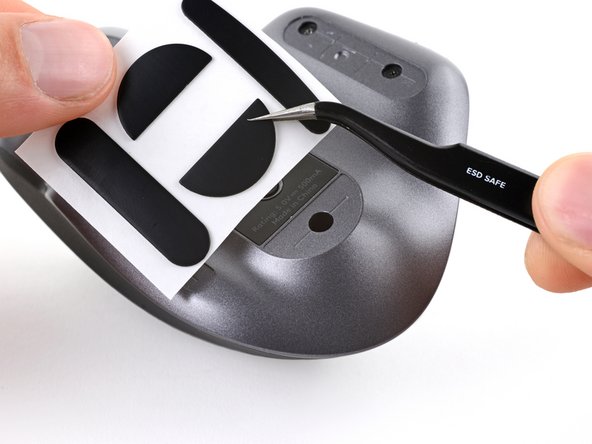
  • Use a pair of tweezers or a spudger to remove any large chunks of leftover adhesive.

  • For installing new mouse feet or reusing your old ones:

  • Thoroughly clean the bottom of the mouse with isopropyl alcohol and a lint-free of microfiber cloth. Allow the surface to dry completely.

  • Peel your new mouse feet away from their adhesive liners and press them firmly into place.

フットから接着剤が剥がれている場合、

スパッジャーの平面側を接着剤の端の下に滑らせます。接着剤が固まっているようであれば、接着剤をさらに加熱する必要があるかもしれません。

ピンセットやスパッジャーを使って、残った接着剤の大きな塊を取り除きます。

新しいマウスフットを取り付けたり、古いマウスフィートを再利用する場合、

マウスの底面をイソプロピルアルコールと糸くずの出ないマイクロファイバークロスで徹底的にクリーニングします。表面を完全に乾かします。

新しいマウスフットを接着ライナーからはがし、所定の位置にしっかりと押し付けます。

crwdns2944171:0crwdnd2944171:0crwdnd2944171:0crwdnd2944171:0crwdne2944171:0