crwdns2933423:0crwdne2933423:0

Sostituzione piedini mouse Logitech MX Master 3S

crwdns2931529:0crwdnd2931529:0crwdnd2931529:0crwdnd2931529:04crwdnd2931529:0crwdne2931529:0

crwdns2935425:04crwdne2935425:0

crwdns2936315:0crwdne2936315:0
crwdns2936321:0crwdne2936321:0
crwdns2931653:04crwdne2931653:0
Logitech MX Master 3S Mouse Feet Replacement, Reassembly information: crwdns2935265:00crwdnd2935265:01crwdnd2935265:03crwdne2935265:0 Logitech MX Master 3S Mouse Feet Replacement, Reassembly information: crwdns2935265:00crwdnd2935265:02crwdnd2935265:03crwdne2935265:0 Logitech MX Master 3S Mouse Feet Replacement, Reassembly information: crwdns2935265:00crwdnd2935265:03crwdnd2935265:03crwdne2935265:0
Reassembly information
  • If the adhesive separated from the foot:

  • Slide the flat end of a spudger under an edge of the adhesive. If the adhesive seems stuck, you may need to heat the adhesive further.

  • Use a pair of tweezers or a spudger to remove any large chunks of leftover adhesive.

  • For installing new mouse feet or reusing your old ones:

  • Thoroughly clean the bottom of the mouse with isopropyl alcohol and a lint-free of microfiber cloth. Allow the surface to dry completely.

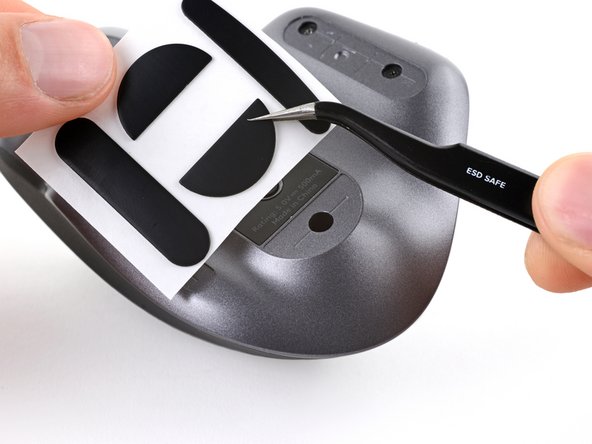
  • Peel your new mouse feet away from their adhesive liners and press them firmly into place.

Se l'adesivo si è separato dal piedino:

Fai scorrere l'estremità piatta di un plettro di apertura sotto un bordo dell'adesivo. Se l'adesivo sembra bloccato, potrebbe essere necessario riscaldarlo ulteriormente.

Utilizza un paio di pinzette o un plettro di apertura per rimuovere eventuali grandi pezzi di adesivo residuo.

Per installare nuovi piedini per il mouse o riutilizzare quelli vecchi:

Pulisci accuratamente il fondo del mouse con alcool isopropilico e un panno privo di pelucchi o in microfibra. Lascia asciugare completamente la superficie.

Stacca i nuovi piedini per il mouse dai loro rivestimenti adesivi e premili saldamente in posizione.

crwdns2944171:0crwdnd2944171:0crwdnd2944171:0crwdnd2944171:0crwdne2944171:0