crwdns2933423:0crwdne2933423:0

Recambio de las Patas del Ratón Logitech MX Master 3S

crwdns2931529:0crwdnd2931529:0crwdnd2931529:0crwdnd2931529:04crwdnd2931529:0crwdne2931529:0

crwdns2935425:04crwdne2935425:0

crwdns2936315:0crwdne2936315:0
crwdns2936331:0crwdne2936331:0
crwdns2931653:04crwdne2931653:0
Logitech MX Master 3S Mouse Feet Replacement, Reassembly information: crwdns2935265:00crwdnd2935265:01crwdnd2935265:03crwdne2935265:0 Logitech MX Master 3S Mouse Feet Replacement, Reassembly information: crwdns2935265:00crwdnd2935265:02crwdnd2935265:03crwdne2935265:0 Logitech MX Master 3S Mouse Feet Replacement, Reassembly information: crwdns2935265:00crwdnd2935265:03crwdnd2935265:03crwdne2935265:0
Reassembly information
  • If the adhesive separated from the foot:

  • Slide the flat end of a spudger under an edge of the adhesive. If the adhesive seems stuck, you may need to heat the adhesive further.

  • Use a pair of tweezers or a spudger to remove any large chunks of leftover adhesive.

  • For installing new mouse feet or reusing your old ones:

  • Thoroughly clean the bottom of the mouse with isopropyl alcohol and a lint-free of microfiber cloth. Allow the surface to dry completely.

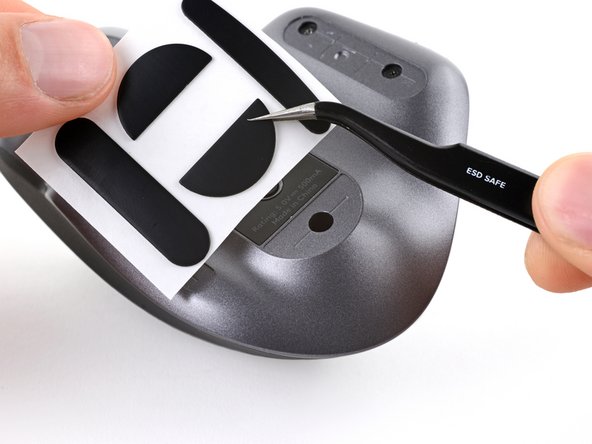
  • Peel your new mouse feet away from their adhesive liners and press them firmly into place.

Si el adhesivo se separa del pie:

Desliza el extremo plano de un spudger bajo un borde del adhesivo. Si el adhesivo parece estar pegado, es posible que tengas que calentarlo más.

Utiliza unas pinzas o un spudger para retirar los trozos grandes de adhesivo sobrante.

Para instalar nuevos pies de ratón o reutilizar los antiguos:

Limpia a fondo la parte inferior del ratón con alcohol isopropílico y un paño de microfibra que no suelte pelusa. Deja que la superficie se seque por completo.

Despega los nuevos pies de ratón de sus revestimientos adhesivos y presiónelos firmemente en su sitio.

crwdns2944171:0crwdnd2944171:0crwdnd2944171:0crwdnd2944171:0crwdne2944171:0