crwdns2933423:0crwdne2933423:0

Google Pixel 3 充電アセンブリの交換

crwdns2931527:0crwdnd2931527:0crwdnd2931527:0crwdnd2931527:0crwdne2931527:0

crwdns2935425:05crwdne2935425:0

crwdns2936315:0crwdne2936315:0
crwdns2936323:0crwdne2936323:0
crwdns2931653:05crwdne2931653:0
Google Pixel 3 Charging Assembly Replacement: crwdns2935265:00crwdnd2935265:01crwdnd2935265:03crwdne2935265:0 Google Pixel 3 Charging Assembly Replacement: crwdns2935265:00crwdnd2935265:02crwdnd2935265:03crwdne2935265:0 Google Pixel 3 Charging Assembly Replacement: crwdns2935265:00crwdnd2935265:03crwdnd2935265:03crwdne2935265:0
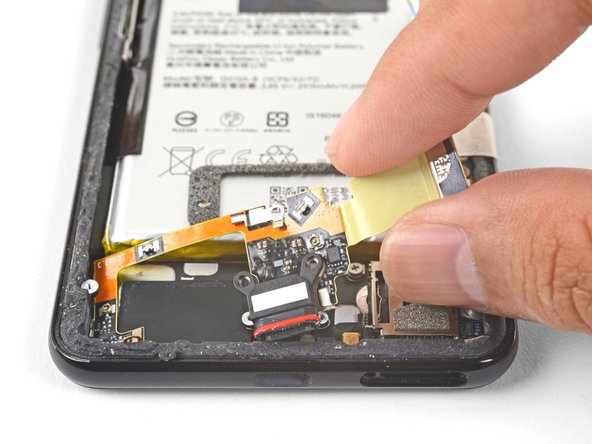
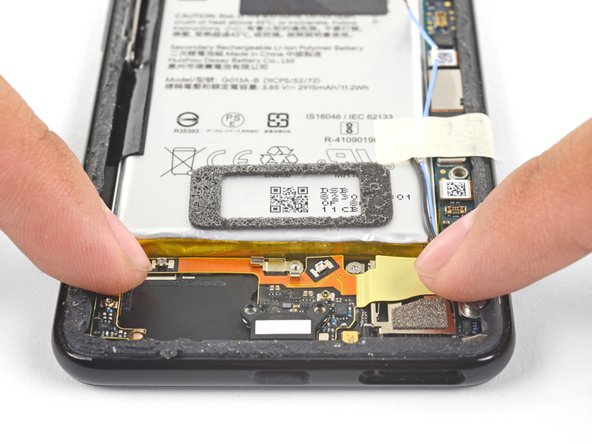
  • When you are installing a replacement assembly:

  • Be sure to remove all plastic liners from the assembly to expose the adhesive.

  • Line up the assembly's bottom left corner into place.

  • Carefully lay the rest of the assembly in place, making sure that the USB-C port is correctly seated in its respective cutout.

  • Use your fingers to press the assembly onto the frame.

交換アセンブリをインストールする際は、

接着面が露出するように、アセンブリからすべてのプラスチックライナーを必ず剥がしてください。

アセンブリの左下隅を所定の正しい位置に重ねます。

USB-Cポートが切り欠きに正しく収まっていることを確認しながら、残りのアセンブリを慎重に配置してください。

指でアセンブリをフレームに押し付けます。

crwdns2944171:0crwdnd2944171:0crwdnd2944171:0crwdnd2944171:0crwdne2944171:0