crwdns2933423:0crwdne2933423:0

バックカバーの接着剤を装着する方法(バックカバー優先)

crwdns2936315:0crwdne2936315:0
crwdns2936323:0crwdne2936323:0
crwdns2931653:06crwdne2931653:0
How to Replace the Back Cover Adhesive (Back Cover First), Replace the microphone adhesive: crwdns2935265:00crwdnd2935265:01crwdnd2935265:03crwdne2935265:0 How to Replace the Back Cover Adhesive (Back Cover First), Replace the microphone adhesive: crwdns2935265:00crwdnd2935265:02crwdnd2935265:03crwdne2935265:0 How to Replace the Back Cover Adhesive (Back Cover First), Replace the microphone adhesive: crwdns2935265:00crwdnd2935265:03crwdnd2935265:03crwdne2935265:0
Replace the microphone adhesive
  • This step shows how to install a replacement microphone gasket. If your kit didn't come with this gasket, skip this step.

  • Use tweezers to remove the old microphone gasket. It may be attached to the back cover or the phone.

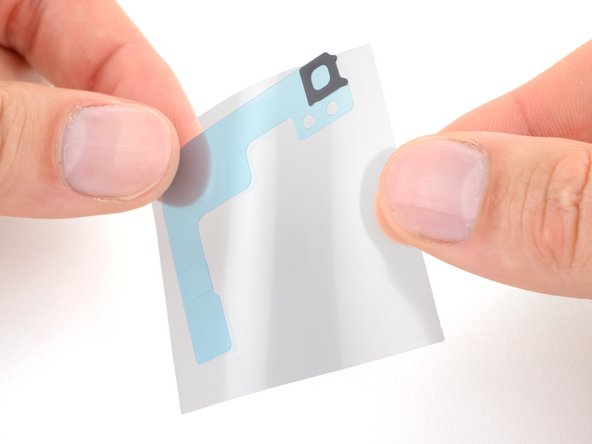
  • Remove the clear liner from the large L-shaped adhesive piece.

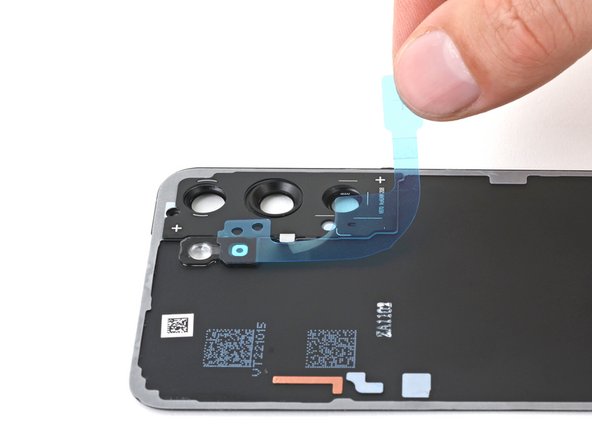
  • Place the square piece of adhesive over the back cover's microphone cutout under the flash unit, with the blue liner tab facing right.

  • Remove the blue liner.

この手順では、交換用マイクガスケットの装着方法を説明します。このガスケットが付属していない場合は、この手順をスキップしてください。

ピンセットを使って、古いマイクのガスケットを取り外します。バックカバーまたはデバイス本体に付いている場合があります。

大きなL字型の接着部分から透明なライナーを剥がします。

フラッシュユニットの下にあるバックカバーのマイクの切り欠きに、青いライナータブを右側に配置して、四角い接着剤の切れ端を装着します。

ブルーのライナーを剥がします。

crwdns2944171:0crwdnd2944171:0crwdnd2944171:0crwdnd2944171:0crwdne2944171:0