crwdns2933423:0crwdne2933423:0

Procédure d'ouverture (1ère et 2ème génération)

crwdns2931529:0crwdnd2931529:0crwdnd2931529:0crwdnd2931529:08crwdnd2931529:0crwdne2931529:0

crwdns2936315:0crwdne2936315:0
crwdns2936317:0crwdne2936317:0
crwdns2931653:022crwdne2931653:0
Opening Procedure (1st and 2nd Gen), Separate the screen from the frame: crwdns2935265:00crwdnd2935265:01crwdnd2935265:03crwdne2935265:0 Opening Procedure (1st and 2nd Gen), Separate the screen from the frame: crwdns2935265:00crwdnd2935265:02crwdnd2935265:03crwdne2935265:0 Opening Procedure (1st and 2nd Gen), Separate the screen from the frame: crwdns2935265:00crwdnd2935265:03crwdnd2935265:03crwdne2935265:0
Separate the screen from the frame
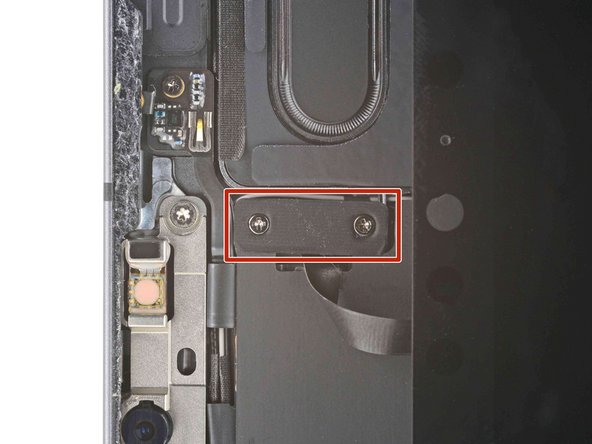
  • Grab two opposing corners of the screen and gently separate the rest of the adhesive.

  • Don't fully remove the screen as it is held in place by several ribbon cables underneath.

  • Shift the screen towards the bottom right corner of the frame until the ambient light sensor ribbon cable near the top edge is uncovered.

Saisissez deux coins opposés de l'écran et séparez délicatement le reste de l'adhésif.

Ne retirez pas complètement l'écran car il est maintenu en place par plusieurs nappes en dessous.

Déplacez l'écran vers le coin inférieur droit du châssis, jusqu'à ce que la nappe du capteur de luminosité ambiante près du bord supérieur soit dégagée.

crwdns2944171:0crwdnd2944171:0crwdnd2944171:0crwdnd2944171:0crwdne2944171:0