crwdns2933423:0crwdne2933423:0

Öffungsvorgang (1. und 2. Generation)

crwdns2931529:0crwdnd2931529:0crwdnd2931529:0crwdnd2931529:08crwdnd2931529:0crwdne2931529:0

crwdns2936315:0crwdne2936315:0
crwdns2936319:0crwdne2936319:0
crwdns2931653:022crwdne2931653:0
Opening Procedure (1st and 2nd Gen), Separate the screen from the frame: crwdns2935265:00crwdnd2935265:01crwdnd2935265:03crwdne2935265:0 Opening Procedure (1st and 2nd Gen), Separate the screen from the frame: crwdns2935265:00crwdnd2935265:02crwdnd2935265:03crwdne2935265:0 Opening Procedure (1st and 2nd Gen), Separate the screen from the frame: crwdns2935265:00crwdnd2935265:03crwdnd2935265:03crwdne2935265:0
Separate the screen from the frame
  • Grab two opposing corners of the screen and gently separate the rest of the adhesive.

  • Don't fully remove the screen as it is held in place by several ribbon cables underneath.

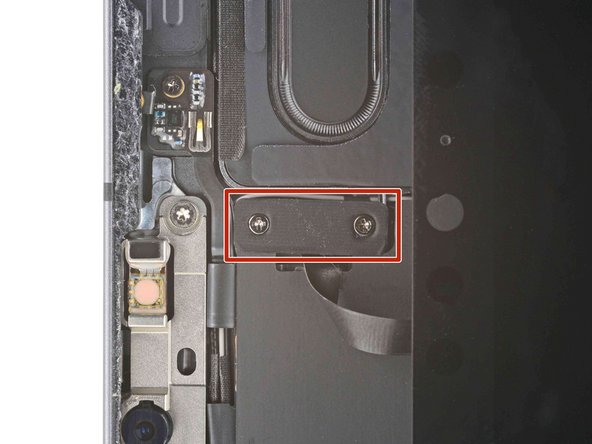
  • Shift the screen towards the bottom right corner of the frame until the ambient light sensor ribbon cable near the top edge is uncovered.

Fasse das Display an zwei gegenüberliegenden Ecken an und trenne vorsichtig den restlichen Kleber auf.

Entferne das Display noch nicht ganz, es wird noch von mehreren Kabeln darunter festgehalten.

Schiebe das Display zur unteren rechten Ecke des Rahmens hin, bis das Flachbandkabel zum Helligkeitssensor nahe an der Oberkante sichtbar wird.

crwdns2944171:0crwdnd2944171:0crwdnd2944171:0crwdnd2944171:0crwdne2944171:0