crwdns2933423:0crwdne2933423:0

Google Pixel 3 XL Displayeinheit tauschen

crwdns2935425:01crwdne2935425:0

crwdns2936315:0crwdne2936315:0
crwdns2936319:0crwdne2936319:0
crwdns2931653:01crwdne2931653:0
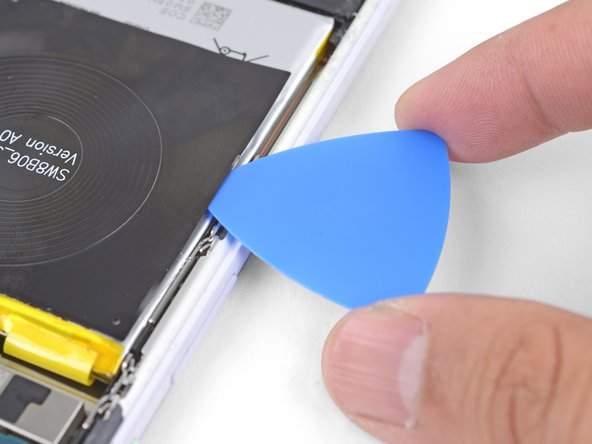
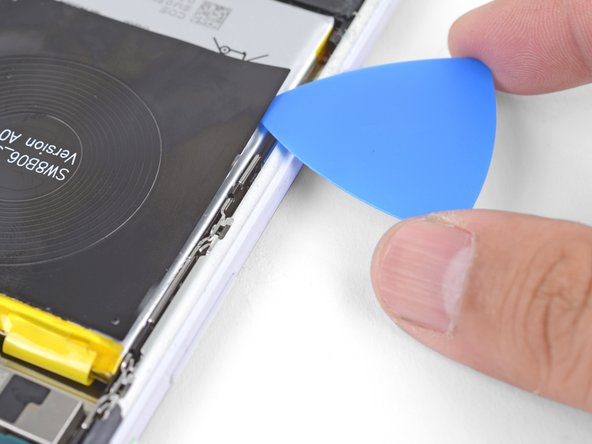
Google Pixel 3 XL Screen Assembly Replacement, Slice under the charging coil: crwdns2935265:00crwdnd2935265:01crwdnd2935265:03crwdne2935265:0 Google Pixel 3 XL Screen Assembly Replacement, Slice under the charging coil: crwdns2935265:00crwdnd2935265:02crwdnd2935265:03crwdne2935265:0 Google Pixel 3 XL Screen Assembly Replacement, Slice under the charging coil: crwdns2935265:00crwdnd2935265:03crwdnd2935265:03crwdne2935265:0
Slice under the charging coil
  • Insert the point of an opening pick underneath one edge of the charging coil.

  • Slide the pick along the edge to loosen the adhesive.

  • Slice as deep as you can while taking care not to puncture the battery's surface.

Setze die Spitze eines Plektrums unter eine Kante der Ladespule ein.

Schiebe das Plektrum an der Kante entlang, um den Kleber zu lösen.

Trenne den Kleber so weit wie möglich auf, aber achte dabei darauf, nicht die Oberfläche des Akkus anzustechen.

crwdns2944171:0crwdnd2944171:0crwdnd2944171:0crwdnd2944171:0crwdne2944171:0