crwdns2931529:0crwdnd2931529:0crwdnd2931529:0crwdnd2931529:06crwdnd2931529:0crwdne2931529:0
crwdns2935425:027crwdne2935425:0
crwdns2931653:027crwdne2931653:0


Pry up the motherboard cover
-
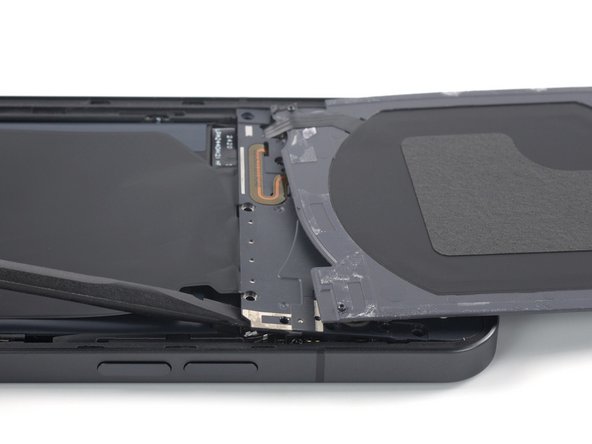
Carefully fold the charging coil to the top edge of the phone to access the bottom edge of the motherboard cover.
-
Insert the flat end of a spudger underneath the bottom right edge of the motherboard cover.
-
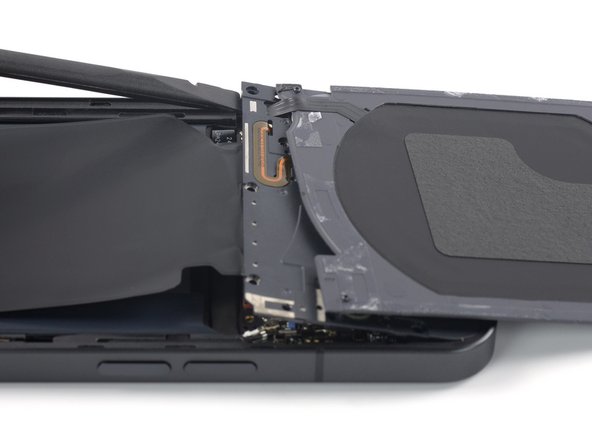
Pry up with the spudger to release the motherboard cover from its clips.
-
Repeat the prying procedure for the bottom left edge of the motherboard cover.
crwdns2944171:0crwdnd2944171:0crwdnd2944171:0crwdnd2944171:0crwdne2944171:0