crwdns2933423:0crwdne2933423:0

Assemblaggio LED glyph

crwdns2931529:0crwdnd2931529:0crwdnd2931529:0crwdnd2931529:06crwdnd2931529:0crwdne2931529:0

crwdns2936315:0crwdne2936315:0
crwdns2936321:0crwdne2936321:0
crwdns2931653:027crwdne2931653:0
LED Glyph Assembly, Pry up the motherboard cover: crwdns2935265:00crwdnd2935265:01crwdnd2935265:03crwdne2935265:0 LED Glyph Assembly, Pry up the motherboard cover: crwdns2935265:00crwdnd2935265:02crwdnd2935265:03crwdne2935265:0 LED Glyph Assembly, Pry up the motherboard cover: crwdns2935265:00crwdnd2935265:03crwdnd2935265:03crwdne2935265:0
Pry up the motherboard cover
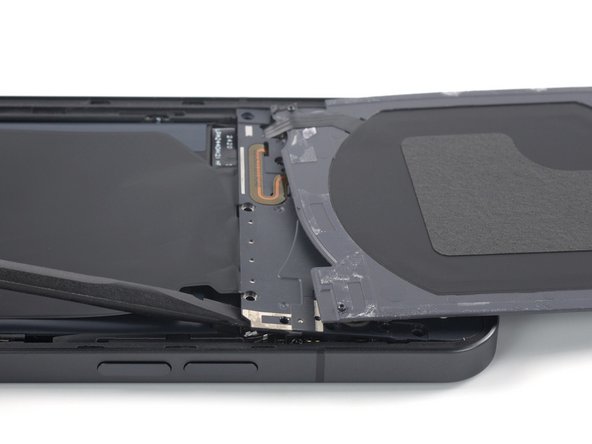
  • Carefully fold the charging coil to the top edge of the phone to access the bottom edge of the motherboard cover.

  • Insert the flat end of a spudger underneath the bottom right edge of the motherboard cover.

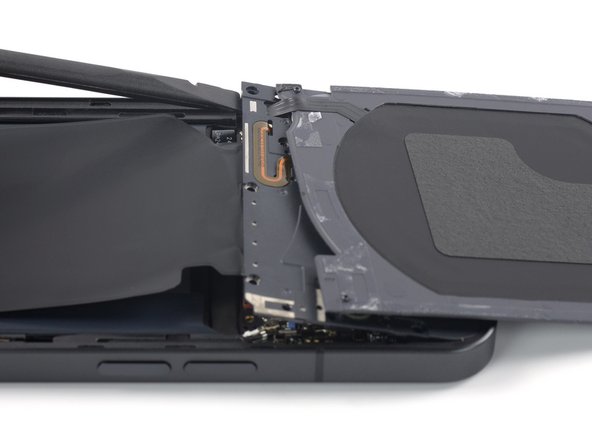
  • Pry up with the spudger to release the motherboard cover from its clips.

  • Repeat the prying procedure for the bottom left edge of the motherboard cover.

Rigira delicatamente la bobina di carica verso il bordo superiore del telefono per avere accesso al bordo inferiore della copertura della scheda madre.

Inserisci la punta piatta di uno spudger sotto il bordo inferiore destro della copertura della scheda madre.

Fai leva verso su con lo spudger per liberare la copertura della scheda madre dalle sue clip.

Ripeti la procedura facendo leva sul bordo inferiore sinistro della copertura della scheda madre.

crwdns2944171:0crwdnd2944171:0crwdnd2944171:0crwdnd2944171:0crwdne2944171:0