crwdns2933423:0crwdne2933423:0

LED Glyph Assembly

crwdns2931529:0crwdnd2931529:0crwdnd2931529:0crwdnd2931529:06crwdnd2931529:0crwdne2931529:0

crwdns2936315:0crwdne2936315:0
crwdns2936323:0crwdne2936323:0
crwdns2931653:024crwdne2931653:0
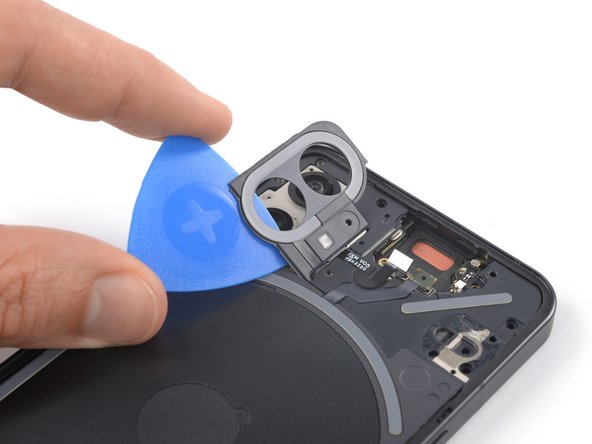
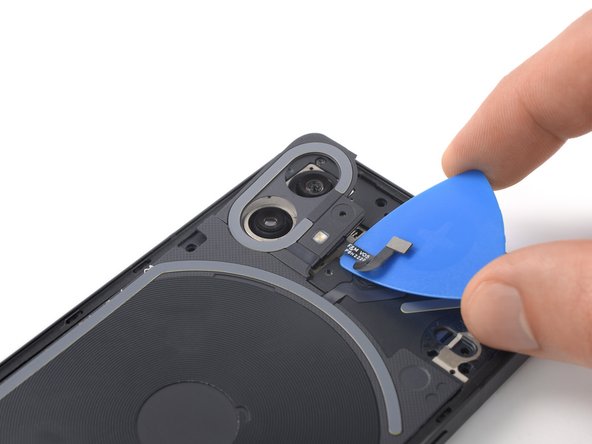
LED Glyph Assembly, Separate the camera cover and flash assembly: crwdns2935265:00crwdnd2935265:01crwdnd2935265:03crwdne2935265:0 LED Glyph Assembly, Separate the camera cover and flash assembly: crwdns2935265:00crwdnd2935265:02crwdnd2935265:03crwdne2935265:0 LED Glyph Assembly, Separate the camera cover and flash assembly: crwdns2935265:00crwdnd2935265:03crwdnd2935265:03crwdne2935265:0
Separate the camera cover and flash assembly
  • Return the charging coil to its original position.

  • Don't try to remove the camera cover and flash assembly all the way. Its cable runs underneath the motherboard cover and is very fragile.

  • Carefully slide an opening pick underneath the camera cover and flash assembly to separate it from the motherboard cover.

crwdns2935429:0crwdne2935429:0

crwdns2935429:0crwdne2935429:0

crwdns2935429:0crwdne2935429:0

crwdns2944171:0crwdnd2944171:0crwdnd2944171:0crwdnd2944171:0crwdne2944171:0