crwdns2933423:0crwdne2933423:0

2. Assembly

crwdns2936315:0crwdne2936315:0
crwdns2936321:0crwdne2936321:0
crwdns2931653:04crwdne2931653:0
2. Assembly, Bed Frame 1: crwdns2935265:00crwdnd2935265:01crwdnd2935265:03crwdne2935265:0 2. Assembly, Bed Frame 1: crwdns2935265:00crwdnd2935265:02crwdnd2935265:03crwdne2935265:0 2. Assembly, Bed Frame 1: crwdns2935265:00crwdnd2935265:03crwdnd2935265:03crwdne2935265:0
Bed Frame 1
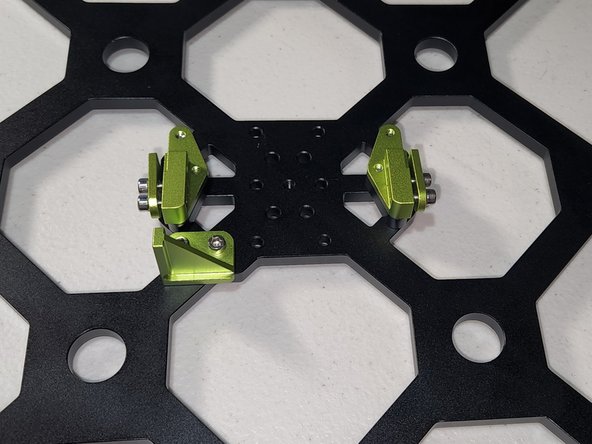
  • Take 2x Y-Axis Belt Lockers and Belt Locker caps. Using 4x M3x10 socket head cap screws partially attach the caps to the lockers.

  • Make sure the rounded end of the cap is towards the side where the belt goes.

  • Secure the Belt Locker Assembly and 2x black spacers to the bed plate using 6x M3x14 socket head cap screws.

  • Note the position of the belt lockers and endstop bump stop. The side with the bump stop will go towards the rear of the printer.

crwdns2935429:0crwdne2935429:0

crwdns2935429:0crwdne2935429:0

crwdns2935429:0crwdne2935429:0

crwdns2935429:0crwdne2935429:0

crwdns2944171:0crwdnd2944171:0crwdnd2944171:0crwdnd2944171:0crwdne2944171:0