crwdns2933423:0crwdne2933423:0

1. BLV Ender 3 V2 Disassembly

crwdns2935425:08crwdne2935425:0

crwdns2936315:0crwdne2936315:0
crwdns2936323:0crwdne2936323:0
crwdns2931653:08crwdne2931653:0
1. BLV Ender 3 V2 Disassembly, Final Results: crwdns2935265:00crwdnd2935265:01crwdnd2935265:03crwdne2935265:0 1. BLV Ender 3 V2 Disassembly, Final Results: crwdns2935265:00crwdnd2935265:02crwdnd2935265:03crwdne2935265:0 1. BLV Ender 3 V2 Disassembly, Final Results: crwdns2935265:00crwdnd2935265:03crwdnd2935265:03crwdne2935265:0
Final Results
  • It's a good idea to remove the PSU entirely. Remove the 4x phillips screws.

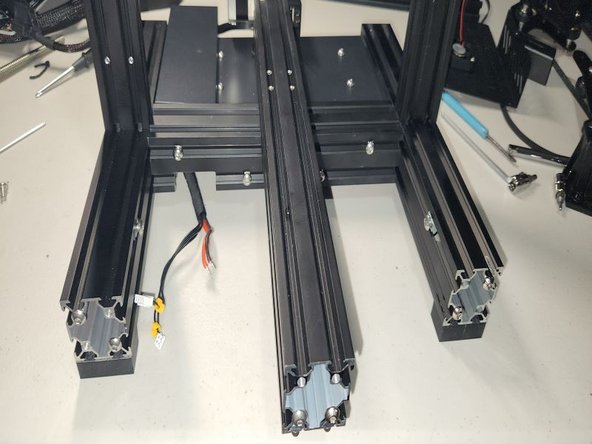
  • This is how your frame should look at this point.

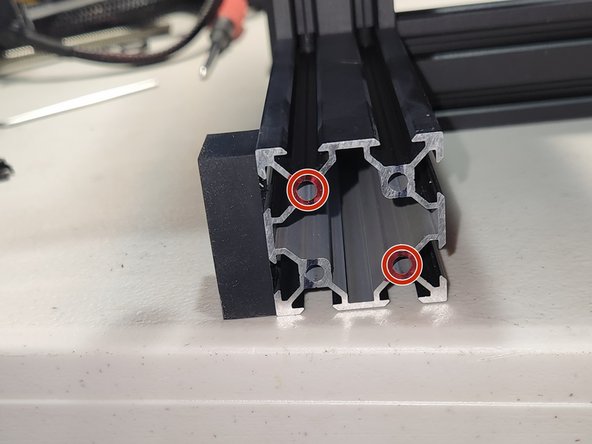
  • If you're going to be using my SKR3 EZ mount you will need to tap these 2 holes on the right front side of the 4040 extrusion with a M5 tap.

crwdns2935429:0crwdne2935429:0

crwdns2935429:0crwdne2935429:0

crwdns2935429:0crwdne2935429:0

crwdns2944171:0crwdnd2944171:0crwdnd2944171:0crwdnd2944171:0crwdne2944171:0