crwdns2935425:07crwdne2935425:0
crwdns2931653:07crwdne2931653:0

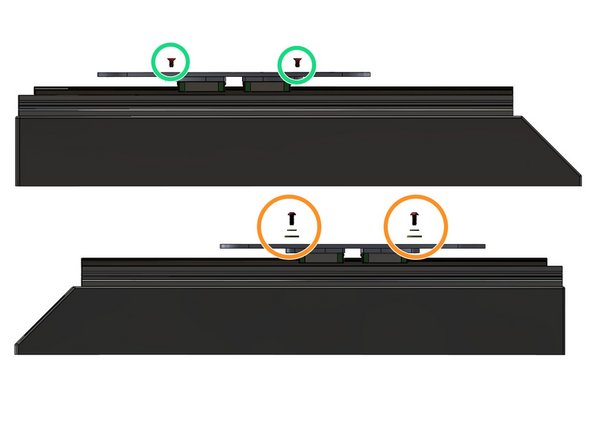


Y Carriage Plate install
-
Belt mounting holes goes on the right side of the priter
-
Left side screws
-
2x M4x8 FHCS
-
M4x10 BHCS - M4 washer - M4 Large OD washer
-
Tightened the left side screws first
crwdns2944171:0crwdnd2944171:0crwdnd2944171:0crwdnd2944171:0crwdne2944171:0