crwdns2933423:0crwdne2933423:0

Changement écran et batterie Wahoo Elemnt Roam (WFCC4)

crwdns2936315:0crwdne2936315:0
crwdns2936317:0crwdne2936317:0
crwdns2931653:010crwdne2931653:0
Wahoo Elemnt Roam (WFCC4) Screen and Battery Replacement, Clean up Old Battery Circuit Board: crwdns2935265:00crwdnd2935265:01crwdnd2935265:03crwdne2935265:0 Wahoo Elemnt Roam (WFCC4) Screen and Battery Replacement, Clean up Old Battery Circuit Board: crwdns2935265:00crwdnd2935265:02crwdnd2935265:03crwdne2935265:0 Wahoo Elemnt Roam (WFCC4) Screen and Battery Replacement, Clean up Old Battery Circuit Board: crwdns2935265:00crwdnd2935265:03crwdnd2935265:03crwdne2935265:0
Clean up Old Battery Circuit Board
  • Although the new battery comes with its own circuit board, we'll have to use the old one as an intermediary / extension

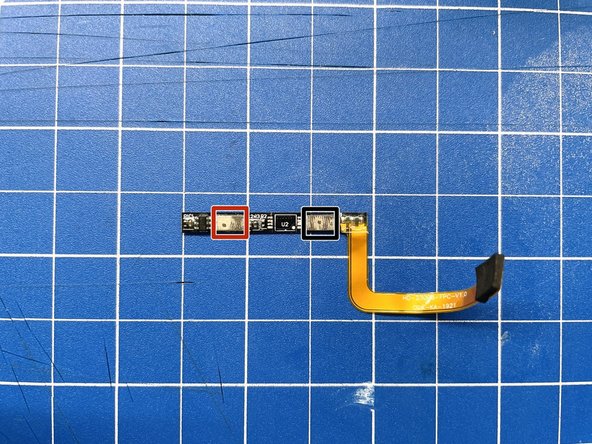
  • Remove the remaining pieces of the old battery connectors from the two main pads. Be careful not to rip off the pads from the circuit board.

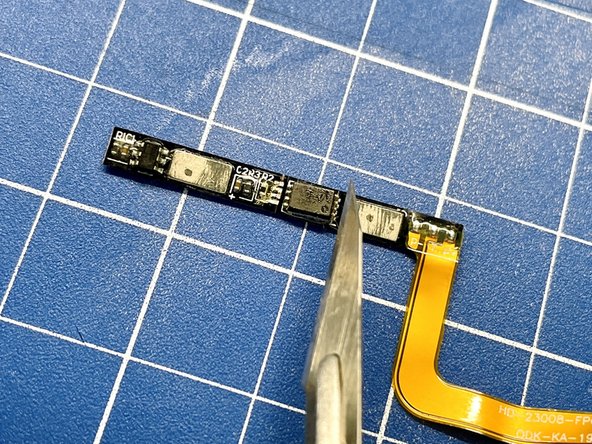
  • To avoid any conflicts between the logic of the old battery's IC and the IC of the new one, we have to remove the old one. Remove the small IC from the circuit board using an exacto knife or similar

  • Use a soldering iron and some soldering wick to remove the remaining solder from the pads for the IC

  • Note The pad to the left of the IC (U2) is for the positive side, and the pad to the right of the IC is for the negative side (see last picture for correct orientation)

Bien que la nouvelle batterie soit livrée avec son propre circuit imprimé, nous devrons utiliser l'ancien circuit comme intermédiaire/extension.

Retirez les morceaux restants des anciens connecteurs de batterie des deux contacts principaux. Veillez à ne pas arracher les pastilles du circuit imprimé.

Pour éviter tout conflit entre le fonctionnement du circuit imprimé de l'ancienne batterie et celui de la nouvelle, nous devons retirer l'ancien circuit. Retirez le petit circuit intégré du circuit imprimé à l'aide d'un scalpel ou d'un outil similaire.

Utilisez un fer à souder et une mèche à dessouder pour enlever le reste de la soudure des contacts du circuit imprimé.

Remarque : la pastille à gauche du circuit intégré (U2) est pour le côté positif, et la pastille à droite du circuit intégré est pour le côté négatif (voir la dernière image pour l'orientation correcte).

crwdns2944171:0crwdnd2944171:0crwdnd2944171:0crwdnd2944171:0crwdne2944171:0