crwdns2933423:0crwdne2933423:0

Dell Latitude 3510 Keyboard Replacement

crwdns2935425:012crwdne2935425:0

crwdns2936319:0crwdne2936319:0
crwdns2936315:0crwdne2936315:0
crwdns2931653:012crwdne2931653:0
Dell Latitude 3510 Keyboard Replacement, Fertig!: crwdns2935265:00crwdnd2935265:01crwdnd2935265:02crwdne2935265:0 Dell Latitude 3510 Keyboard Replacement, Fertig!: crwdns2935265:00crwdnd2935265:02crwdnd2935265:02crwdne2935265:0
Fertig!
  • Die letzten Teile die wir entfernen müssen sind das Verbindungsboard zwischen Powerbutton und Extensionboard (grünes Rechteck) sowie die Halterung der SDD (rosa Rechteck). Das Verbindungsboard lässt sich vorsichtig mit einem Spudger entfernen, die Halterung ist nur eingeklemmt.

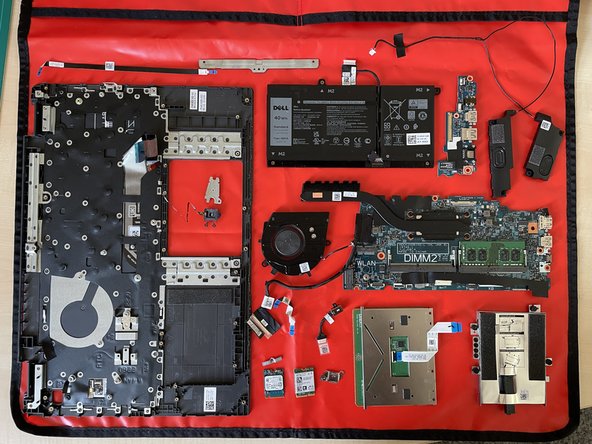
  • Jetzt sollten alle Teile vom C-Cover und damit der Tastatur entfernt sein und können auf einer neuen Tastatur verbaut werden.

  • Leider ist die Tastatur bei diesem Modell mit dem C-Cover verschweißt. Um das Notebook wieder zusammen zu bauen einfach alles in umgekehrter Reihenfolge anschauen. Viel Spaß beim Schrauben.

The last parts we need to remove are the small bridging board between power button and extension board (green rectangle) as well as the ssd bracket (pink rectangle). The bridging board is easily removed by using a spudger and the bracket is removable by pushing it down.

Now all parts from C-cover and thus the keyboard should be removed and can be placed on the new keyboard.

Unfortunately the keyboard cannot be separated from the c-cover. To reassemble just follow all steps in reverse order. Happy repairs!

crwdns2944171:0crwdnd2944171:0crwdnd2944171:0crwdnd2944171:0crwdne2944171:0