crwdns2933423:0crwdne2933423:0

Samsung Galaxy A72 스크린 교체

crwdns2936315:0crwdne2936315:0
crwdns2936325:0crwdne2936325:0
crwdns2931653:05crwdne2931653:0
Samsung Galaxy A72 Screen Replacement: crwdns2935265:00crwdnd2935265:01crwdnd2935265:03crwdne2935265:0 Samsung Galaxy A72 Screen Replacement: crwdns2935265:00crwdnd2935265:02crwdnd2935265:03crwdne2935265:0 Samsung Galaxy A72 Screen Replacement: crwdns2935265:00crwdnd2935265:03crwdnd2935265:03crwdne2935265:0
  • If the adhesive becomes hard to cut, it has most likely cooled down. Use your iOpener or heat gun for 1–2 minutes to reheat it.

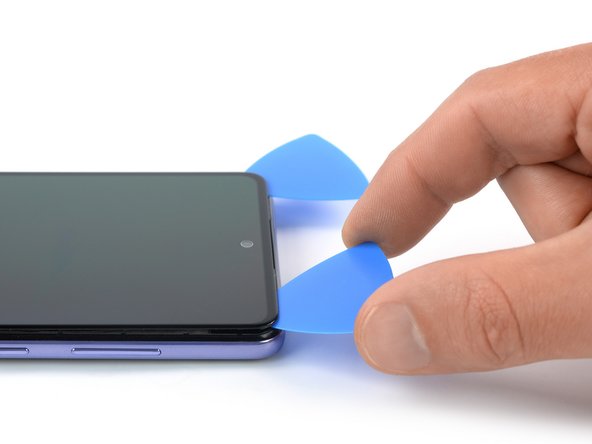
  • Insert a third opening pick underneath the top left corner of the screen.

  • When you slice near the front facing camera, insert only the tip of the opening pick (~2–3 mm) to avoid damaging or smearing the camera.

  • Slide the opening pick to the top right corner of the screen to slice its adhesive.

  • Leave the opening pick in its place to prevent the adhesive from resealing.

접착제를 자르기 어려워지면, 접착제가 식었을 가능성이 큽니다. 열선총 또는 iOpener를 사용하여 1-2분 동안 재가열하세요.

상단 왼편 모서리 밑에 세 번째 여는 픽을 끼우세요.

전면 카메라 가까이서 자를때 , 카메라를 손상하거나 문지르지 않도록 여는 픽의 끝 부분만 (~2–3 mm) 끼우세요.

여는 픽을 상단 오른편 모서리를 향해 밀어서 접착제를 자르세요.

접착제가 다시 붙지 않도록 그 자리에 여는 픽을 남겨 두세요.

crwdns2944171:0crwdnd2944171:0crwdnd2944171:0crwdnd2944171:0crwdne2944171:0