crwdns2933423:0crwdne2933423:0

iPad 9 Front Panel tauschen

crwdns2931527:0crwdnd2931527:0crwdnd2931527:0crwdnd2931527:0crwdne2931527:0

crwdns2936315:0crwdne2936315:0
crwdns2936319:0crwdne2936319:0
crwdns2931653:020crwdne2931653:0
iPad 9 Front Panel Replacement: crwdns2935265:00crwdnd2935265:01crwdnd2935265:03crwdne2935265:0 iPad 9 Front Panel Replacement: crwdns2935265:00crwdnd2935265:02crwdnd2935265:03crwdne2935265:0 iPad 9 Front Panel Replacement: crwdns2935265:00crwdnd2935265:03crwdnd2935265:03crwdne2935265:0
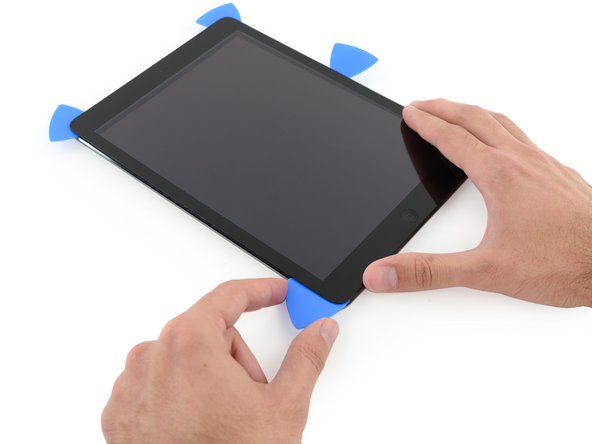
  • Slide the lower left pick to the lower left corner to cut the adhesive on that corner.

  • Leave the pick at the corner. Do not pry any farther, and do not remove the pick from the iPad.

  • The third image shows the two antennas and the home button cavity in the lower case of the iPad.

  • The following steps will direct you where to pry to avoid damage to these components. Only apply heat and pry where directed.

Schiebe das untere linke Plektrum in die untere linke Ecke, um den Kleber an dieser Ecke durchzuschneiden.

Lass das Plektrum an der Ecke stecken. Heble nicht weiter und entferne das Plektrum nicht aus dem iPad.

Das dritte Bild zeigt die beiden Antennen und die Aussparung für den Home Button im Gehäuseunterteil des iPads.

In den folgenden Schritten erfährst du, wo du hebeln musst, um diese Komponenten nicht zu beschädigen. Wende nur dort Hitze an und heble nur dort, wo es vorgegeben ist.

crwdns2944171:0crwdnd2944171:0crwdnd2944171:0crwdnd2944171:0crwdne2944171:0