crwdns2935425:015crwdne2935425:0


-
Two more screws are accessed at the lower edge of the right side, which is standing up vertically right now. Remove them.
-
The base panel is now loose. So pull the front edge of it away from the front door side of the printer (which should be on top), but KEEP THE BOTTOM EDGE OF THE PANEL NEAR THE PRINTER!
-
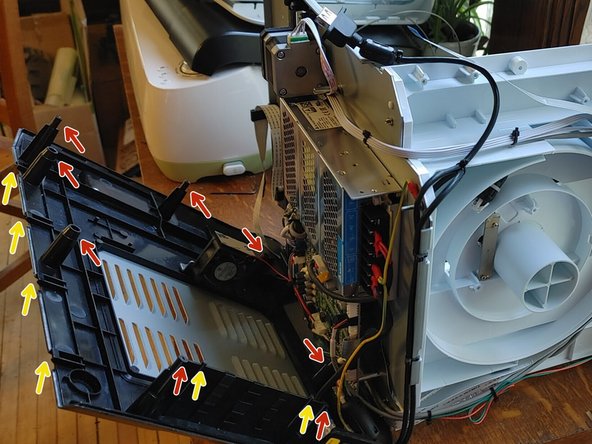
Inside, you'll find wires attached in three places that need to be disconnected to completely remove the base panel. If you're able to do your fix without actually taking the panel off the rest of the way, you definitely should, because the center wire is a tricky one.
-
On the left, the red and black wires can be pulled out where they connect on the motherboard.
-
On the right is a black casing with a red wire and a blue wire inside, and a separate yellow wire. They can be pulled straight out where they attach to the base panel. Alternatively, you can unscrew them from above the motherboard.
-
The center white wire looks like it's soldered on both ends. Not an easy removal, and beyond the scope of this teardown, so proceed at your own risk.
crwdns2944171:0crwdnd2944171:0crwdnd2944171:0crwdnd2944171:0crwdne2944171:0