crwdns2935425:08crwdne2935425:0
crwdns2931653:08crwdne2931653:0


Remove Back Panel (2/2)
-
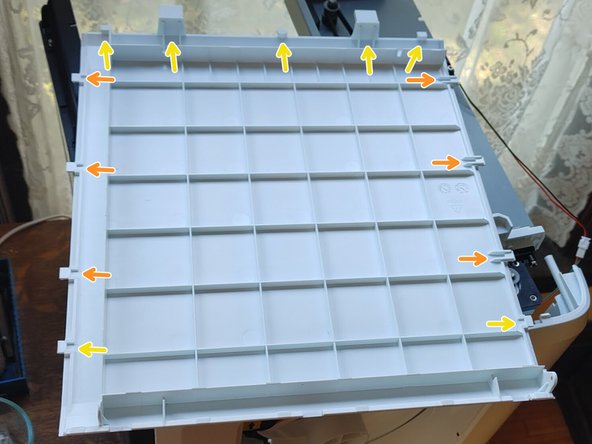
Pull the back panel away from the right side panel to remove it. These are push clips, but they don't have visible release sockets, so to release them you'll need to apply inward pressure to the back panel, while pulling outward on the right side panel, since three of the fasteners are push clips. I found the bottom corner was tricky, here.
-
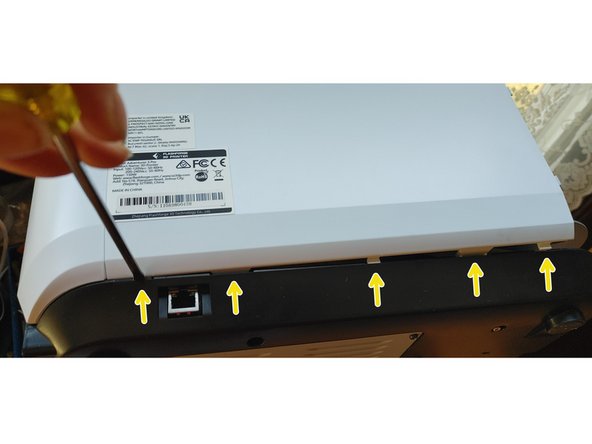
The five tabs along the bottom edge of the back panel should slip out on their own, but you can use a plastic spudger or flat head screwdriver to help if needed.
-
Screw the right hex washer screw back into the flooring plate just a few turns, to keep it safe.
crwdns2944171:0crwdnd2944171:0crwdnd2944171:0crwdnd2944171:0crwdne2944171:0