crwdns2935425:05crwdne2935425:0


-
You already removed three push clips along the top edge of the left side panel, which secured the top panel.
-
From the top of the machine, remove the three black phillips head screws at the back left corner of the printer. The the corner screw is one of the two longer ones.
-
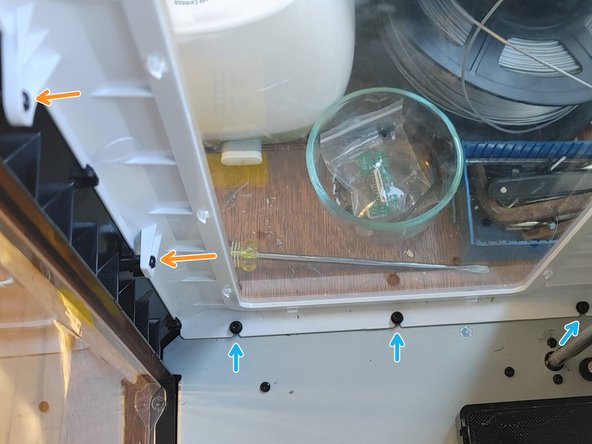
Inside the printer, to the left of the door, there are two black phillips head screws that attach the left panel to the front panel. Remove these.
-
Still inside the printer, you'll see three black screws attaching the left panel to the floor plate, each with a small washer. THESE ARE HEX HEADS, not phillips. But DO NOT REMOVE THESE SCREWS! You can just loosen them, but leave them attached to the floorplate for safe storage.
-
At the bottom outside edge of the left panel, there are six push clips running horizontally that you'll need to release by pressing a plastic spudger or flat head screwdriver against the base of each.
-
Attached to the back panel, at the back left corner of the printer, there are four more push clips running vertically to disengage.
-
The panel should now pull away from the printer.
crwdns2944171:0crwdnd2944171:0crwdnd2944171:0crwdnd2944171:0crwdne2944171:0