crwdns2933423:0crwdne2933423:0

Dell XPS 14 Back Panel Replacement

crwdns2931529:0crwdnd2931529:0crwdnd2931529:0crwdnd2931529:05crwdnd2931529:0crwdne2931529:0

crwdns2935425:04crwdne2935425:0

crwdns2936315:0crwdne2936315:0
crwdns2936325:0crwdne2936325:0
crwdns2931653:04crwdne2931653:0
Dell XPS 14 Back Panel Replacement: crwdns2935265:00crwdnd2935265:01crwdnd2935265:03crwdne2935265:0 Dell XPS 14 Back Panel Replacement: crwdns2935265:00crwdnd2935265:02crwdnd2935265:03crwdne2935265:0 Dell XPS 14 Back Panel Replacement: crwdns2935265:00crwdnd2935265:03crwdnd2935265:03crwdne2935265:0
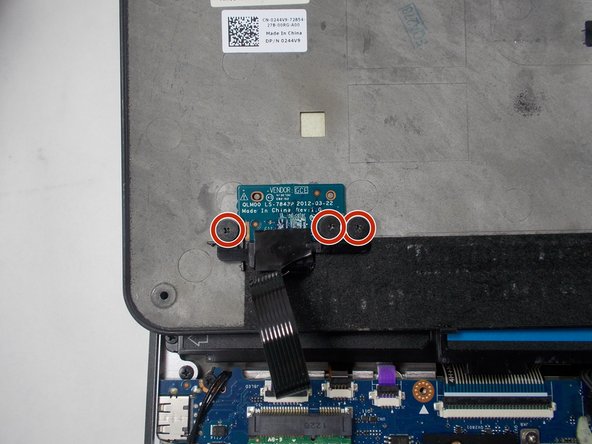
  • Flip over the back panel so that the interior of the panel is facing up.

  • Remove three 2 mm screws that are connected to the vendor GCE disk on the bottom left corner of the back panel using a Phillips #0 screwdriver.

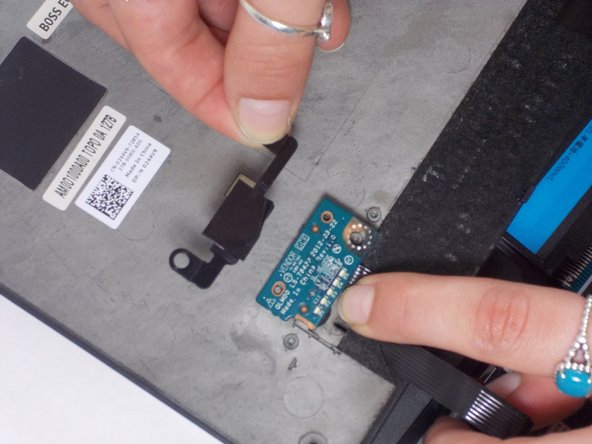
  • Remove the black plastic cover that holds the disk in place.

  • Remove the back panel.

  • The GCE disk should still be connected to the computer via a purple ribbon cable.

crwdns2935429:0crwdne2935429:0

crwdns2935429:0crwdne2935429:0

crwdns2935429:0crwdne2935429:0

crwdns2935429:0crwdne2935429:0

crwdns2935429:0crwdne2935429:0

crwdns2944171:0crwdnd2944171:0crwdnd2944171:0crwdnd2944171:0crwdne2944171:0