crwdns2933423:0crwdne2933423:0

Nintendo Switch OLEDモデル スクリーンOLEDアセンブリの交換

crwdns2936315:0crwdne2936315:0
crwdns2936323:0crwdne2936323:0
crwdns2931653:05crwdne2931653:0
Nintendo Switch OLED Model Screen OLED Assembly Replacement, Separate the battery's adhesive: crwdns2935265:00crwdnd2935265:01crwdnd2935265:03crwdne2935265:0 Nintendo Switch OLED Model Screen OLED Assembly Replacement, Separate the battery's adhesive: crwdns2935265:00crwdnd2935265:02crwdnd2935265:03crwdne2935265:0 Nintendo Switch OLED Model Screen OLED Assembly Replacement, Separate the battery's adhesive: crwdns2935265:00crwdnd2935265:03crwdnd2935265:03crwdne2935265:0
Separate the battery's adhesive
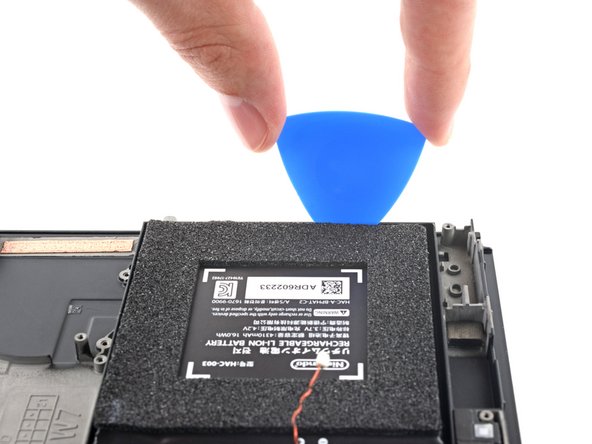
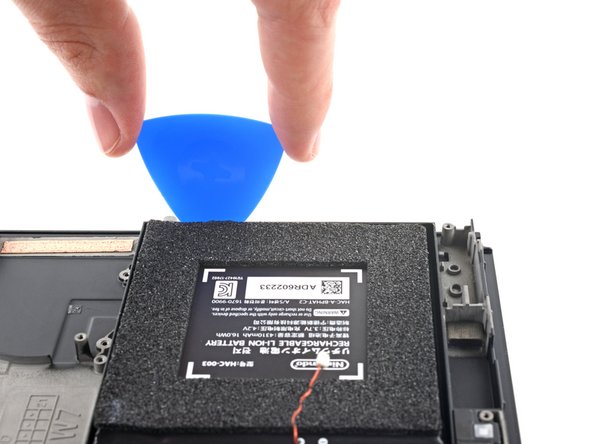
  • Insert an opening pick into the gap between the battery and the wall of the battery well.

  • Carefully dig the tip of the opening pick underneath the battery and slide it along the edge to begin slicing the adhesive.

  • Take care not to puncture or bend the battery with your tool—a punctured or bent battery may leak dangerous chemicals or cause a fire.

オープニングピックをバッテリーとバッテリーの溝の壁の間に差し込みます。

オープニングピックの先端をバッテリーの下に差し込み、接着剤をスライスするために端に沿ってスライドします。

ツールでバッテリーを破損したり変形させないように注意してください。穴が開いたバッテリーは引火の恐れがあり、危険な化学物質が排出される恐れがあります。

crwdns2944171:0crwdnd2944171:0crwdnd2944171:0crwdnd2944171:0crwdne2944171:0