crwdns2933423:0crwdne2933423:0

Sostituire il gruppo schermo OLED Nintendo Switch – Modello OLED

crwdns2936315:0crwdne2936315:0
crwdns2936321:0crwdne2936321:0
crwdns2931653:05crwdne2931653:0
Nintendo Switch OLED Model Screen OLED Assembly Replacement, Separate the battery's adhesive: crwdns2935265:00crwdnd2935265:01crwdnd2935265:03crwdne2935265:0 Nintendo Switch OLED Model Screen OLED Assembly Replacement, Separate the battery's adhesive: crwdns2935265:00crwdnd2935265:02crwdnd2935265:03crwdne2935265:0 Nintendo Switch OLED Model Screen OLED Assembly Replacement, Separate the battery's adhesive: crwdns2935265:00crwdnd2935265:03crwdnd2935265:03crwdne2935265:0
Separate the battery's adhesive
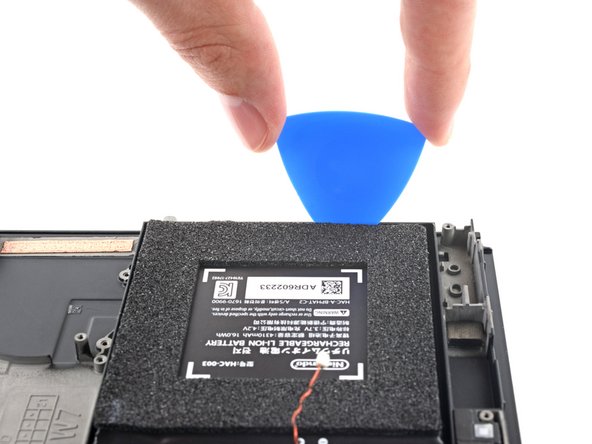
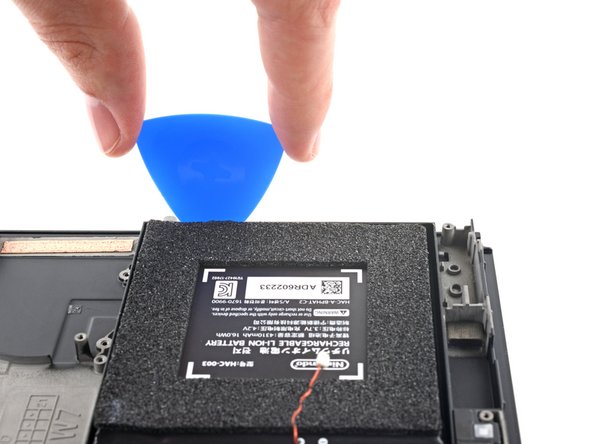
  • Insert an opening pick into the gap between the battery and the wall of the battery well.

  • Carefully dig the tip of the opening pick underneath the battery and slide it along the edge to begin slicing the adhesive.

  • Take care not to puncture or bend the battery with your tool—a punctured or bent battery may leak dangerous chemicals or cause a fire.

Inserisci un plettro di apertura all'interno della fessura fra la batteria e il bordo del vano batteria.

Sposta con attenzione la punta del plettro di apertura sotto la batteria e fallo scorrere lungo il bordo per iniziare a tagliare l'adesivo.

Fai attenzione a non forare o piegare la batteria con l'utensile: una batteria forata o piegata potrebbe far fuoriuscire sostanze chimiche pericolose o provocare un incendio.

crwdns2944171:0crwdnd2944171:0crwdnd2944171:0crwdnd2944171:0crwdne2944171:0