crwdns2933423:0crwdne2933423:0

Changement ensemble écran OLED Nintendo Switch modèle OLED

crwdns2936315:0crwdne2936315:0
crwdns2936317:0crwdne2936317:0
crwdns2931653:05crwdne2931653:0
Nintendo Switch OLED Model Screen OLED Assembly Replacement, Separate the battery's adhesive: crwdns2935265:00crwdnd2935265:01crwdnd2935265:03crwdne2935265:0 Nintendo Switch OLED Model Screen OLED Assembly Replacement, Separate the battery's adhesive: crwdns2935265:00crwdnd2935265:02crwdnd2935265:03crwdne2935265:0 Nintendo Switch OLED Model Screen OLED Assembly Replacement, Separate the battery's adhesive: crwdns2935265:00crwdnd2935265:03crwdnd2935265:03crwdne2935265:0
Separate the battery's adhesive
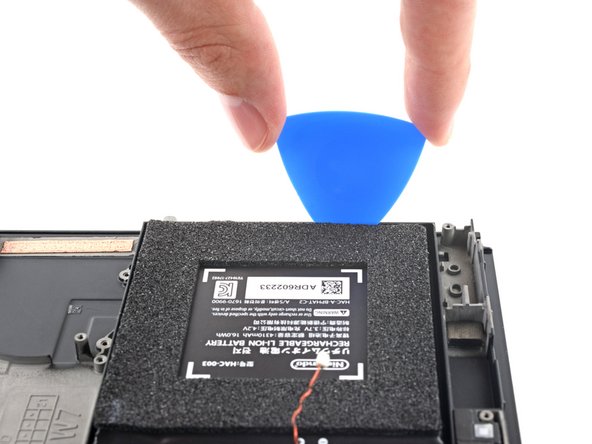
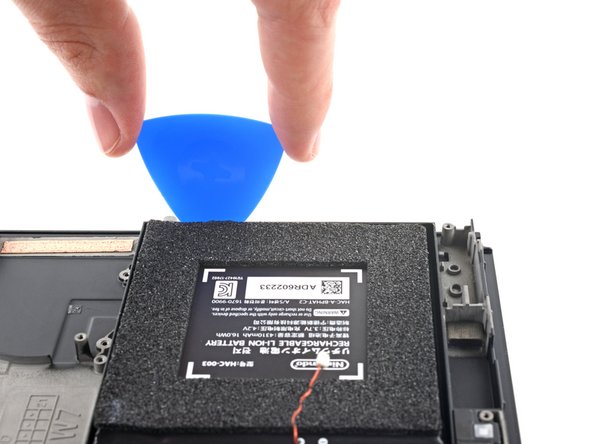
  • Insert an opening pick into the gap between the battery and the wall of the battery well.

  • Carefully dig the tip of the opening pick underneath the battery and slide it along the edge to begin slicing the adhesive.

  • Take care not to puncture or bend the battery with your tool—a punctured or bent battery may leak dangerous chemicals or cause a fire.

Insérez un médiator dans l'espace entre la batterie et la paroi du compartiment de la batterie.

Enfoncez soigneusement la pointe du médiator sous la batterie et faites-la glisser le long du bord, pour commencer à trancher l'adhésif.

Veillez à ni perforer ni plier la batterie avec votre outil—une batterie perforée ou pliée peut laisser s'échapper des produits chimiques dangereux ou provoquer un incendie.

crwdns2944171:0crwdnd2944171:0crwdnd2944171:0crwdnd2944171:0crwdne2944171:0