crwdns2933423:0crwdne2933423:0

Google Pixel 5a バッテリーの交換

crwdns2936315:0crwdne2936315:0
crwdns2936323:0crwdne2936323:0
crwdns2931653:02crwdne2931653:0
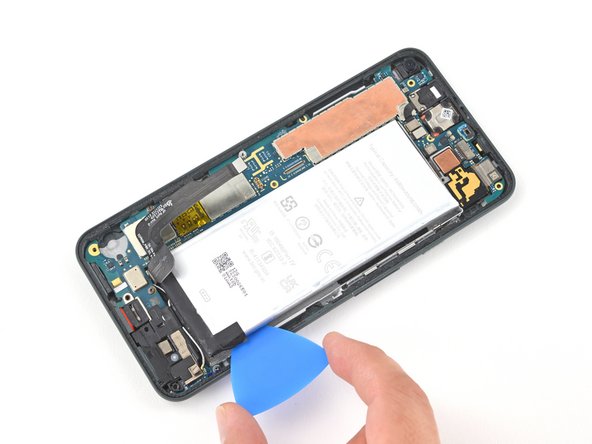
Google Pixel 5a Battery Replacement, Slice the adhesive: crwdns2935265:00crwdnd2935265:01crwdnd2935265:03crwdne2935265:0 Google Pixel 5a Battery Replacement, Slice the adhesive: crwdns2935265:00crwdnd2935265:02crwdnd2935265:03crwdne2935265:0 Google Pixel 5a Battery Replacement, Slice the adhesive: crwdns2935265:00crwdnd2935265:03crwdnd2935265:03crwdne2935265:0
Slice the adhesive
  • Insert a pick into the gap to the right of the battery and slide its tip underneath the battery.

  • Take care not to puncture or bend the battery with your tool—a punctured or bent battery may leak dangerous chemicals or cause a fire.

  • Slide the pick along the right side of the battery to slice through the adhesive securing it to the midframe.

  • Once the right side of the battery begins to separate from the midframe, leave an opening pick in the gap to keep the battery slightly raised.

  • Apply a few drops of isopropyl alcohol directly to the adhesive securing the battery to the midframe. Let the isopropyl penetrate the adhesive for 2-3 minutes.

バッテリー右側の隙間にピックを差し込み、その先端をバッテリー下まで滑り込ませます。

バッテリーに穴をあけたり、曲げたりすると、危険な化学物質が漏れたり、火災の原因になることがあります。

バッテリー右側に沿ってピックをスライドさせ、ミッドフレームに固定している接着剤をスライスします。

バッテリー右側がミッドフレームから乖離し始めたら、バッテリーが少し浮き上がったまま、隙間に開口ピックを残しておきます。

バッテリーをミッドフレームに固定している接着剤に、イソプロピルアルコールを数滴、直接塗布してください。アルコールを接着剤に2-3分浸透させて、接着面が柔らかくなるまで待ちます。

crwdns2944171:0crwdnd2944171:0crwdnd2944171:0crwdnd2944171:0crwdne2944171:0