crwdns2933423:0crwdne2933423:0

Google Pixel 6 スクリーン交換

crwdns2931529:0crwdnd2931529:0crwdnd2931529:0crwdnd2931529:06crwdnd2931529:0crwdne2931529:0

crwdns2936315:0crwdne2936315:0
crwdns2936323:0crwdne2936323:0
crwdns2931653:06crwdne2931653:0
Google Pixel 6 Screen Replacement, Insert an opening pick: crwdns2935265:00crwdnd2935265:01crwdnd2935265:03crwdne2935265:0 Google Pixel 6 Screen Replacement, Insert an opening pick: crwdns2935265:00crwdnd2935265:02crwdnd2935265:03crwdne2935265:0 Google Pixel 6 Screen Replacement, Insert an opening pick: crwdns2935265:00crwdnd2935265:03crwdnd2935265:03crwdne2935265:0
Insert an opening pick
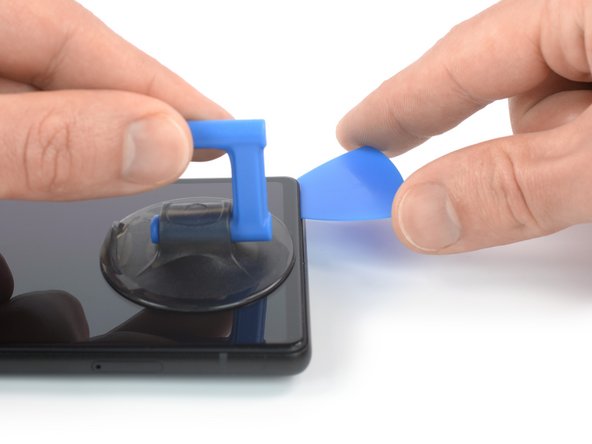
  • Once the screen is warm to the touch, apply a suction handle to the bottom edge of the screen.

  • If your screen is badly cracked, covering it with a layer of clear packing tape may allow the suction handle to adhere. Alternatively, very strong tape may be used instead of the suction handle. If all else fails, you can superglue the suction handle to the screen.

  • Lift the screen, including its safety frame, with the suction handle to create a small gap between the screen and the phone assembly.

  • Insert an opening pick into the gap between the screen frame and the phone assembly.

  • Make sure to insert your opening pick in the right position to avoid separating the screen from its safety frame instead of the phone assembly.

  • Slide the opening pick to the bottom right corner of the screen to slice its adhesive.

  • Leave the opening pick in place to prevent the adhesive from resealing.

スクリーンが温まったたら、スクリーン下端に吸盤を当てます。

スクリーンの割れがひどい場合は、透明のガムテープを重ねると吸着できる場合があります。また、吸盤の代わりに非常に強力なテープを使用すれば吸盤をスクリーンに接着することもできます。それでも難しい場合は強力なボンドを吸盤に付着してスクリーンに取り付けてください。

吸引ハンドルでスクリーンを安全フレームを含めて持ち上げ、スクリーンとデバイスの間に小さな隙間を作ります。

オープニングピックをスクリーンフレームとデバイス本体の隙間に差し込みます。

オープニングピックを正しい位置に差し込み、スクリーンがデバイス本体ではなく、セーフティーフレームから分離しないように注意してください。

オープニングピックをスクリーン左下隅にスライドさせ、接着剤を切開します。

接着剤が再装着しないように、オープニングピックをそのままにしておきます。

crwdns2944171:0crwdnd2944171:0crwdnd2944171:0crwdnd2944171:0crwdne2944171:0