crwdns2933423:0crwdne2933423:0

Sostituzione Schermo Google Pixel 6

crwdns2931529:0crwdnd2931529:0crwdnd2931529:0crwdnd2931529:06crwdnd2931529:0crwdne2931529:0

crwdns2936315:0crwdne2936315:0
crwdns2936321:0crwdne2936321:0
crwdns2931653:06crwdne2931653:0
Google Pixel 6 Screen Replacement, Insert an opening pick: crwdns2935265:00crwdnd2935265:01crwdnd2935265:03crwdne2935265:0 Google Pixel 6 Screen Replacement, Insert an opening pick: crwdns2935265:00crwdnd2935265:02crwdnd2935265:03crwdne2935265:0 Google Pixel 6 Screen Replacement, Insert an opening pick: crwdns2935265:00crwdnd2935265:03crwdnd2935265:03crwdne2935265:0
Insert an opening pick
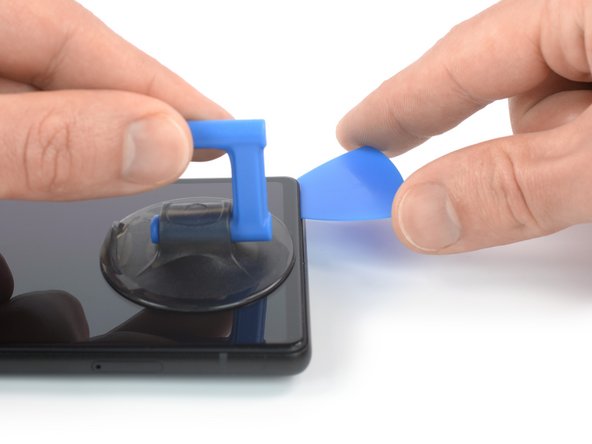
  • Once the screen is warm to the touch, apply a suction handle to the bottom edge of the screen.

  • If your screen is badly cracked, covering it with a layer of clear packing tape may allow the suction handle to adhere. Alternatively, very strong tape may be used instead of the suction handle. If all else fails, you can superglue the suction handle to the screen.

  • Lift the screen, including its safety frame, with the suction handle to create a small gap between the screen and the phone assembly.

  • Insert an opening pick into the gap between the screen frame and the phone assembly.

  • Make sure to insert your opening pick in the right position to avoid separating the screen from its safety frame instead of the phone assembly.

  • Slide the opening pick to the bottom right corner of the screen to slice its adhesive.

  • Leave the opening pick in place to prevent the adhesive from resealing.

Quando lo schermo è caldo al tatto, applica una ventosa sul bordo inferiore dello schermo.

Se lo schermo è gravemente rotto, coprirlo con uno strato di nastro adesivo trasparente potrebbe far aderire la ventosa. In alternativa, nastro adesivo molto forte può essere utilizzato al posto della ventosa. Se tutto il resto fallisce, puoi incollare la ventosa allo schermo.

Solleva lo schermo, compreso il suo telaio di sicurezza, con la ventosa per creare un piccolo spazio tra lo schermo e il gruppo del telefono.

Inserisci un plettro di apertura nello spazio tra la cornice dello schermo e il gruppo del telefono.

Assicurati di inserire il tuo plettro di apertura nella posizione giusta per evitare di separare lo schermo dalla sua cornice di sicurezza invece che dal gruppo del telefono.

Fai scorrere il plettro di apertura nell'angolo in basso a destra dello schermo per tagliare l'adesivo.

Lascia il plettro di apertura in posizione per evitare che l'adesivo si richiuda.

crwdns2944171:0crwdnd2944171:0crwdnd2944171:0crwdnd2944171:0crwdne2944171:0