crwdns2933423:0crwdne2933423:0

Sostituzione schermo Samsung Galaxy S21

crwdns2936315:0crwdne2936315:0
crwdns2936321:0crwdne2936321:0
crwdns2931653:06crwdne2931653:0
Samsung Galaxy S21 Screen Replacement, Insert an opening pick: crwdns2935265:00crwdnd2935265:01crwdnd2935265:03crwdne2935265:0 Samsung Galaxy S21 Screen Replacement, Insert an opening pick: crwdns2935265:00crwdnd2935265:02crwdnd2935265:03crwdne2935265:0 Samsung Galaxy S21 Screen Replacement, Insert an opening pick: crwdns2935265:00crwdnd2935265:03crwdnd2935265:03crwdne2935265:0
Insert an opening pick
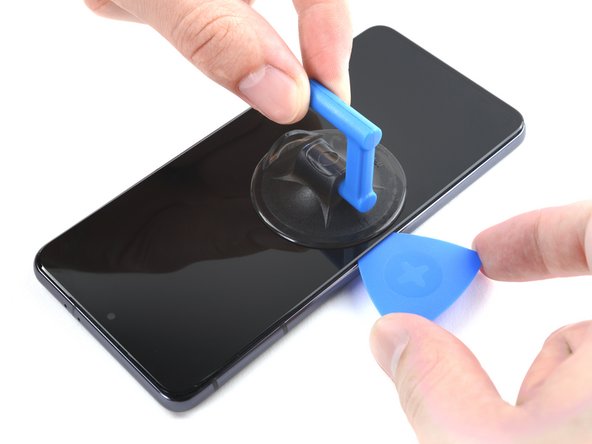
  • Once the screen is warm to touch, apply a suction handle to the left edge of the screen and as close to the edge as possible.

  • If your screen is badly cracked, covering it with a layer of clear packing tape may allow the suction cup to adhere. Alternatively, very strong tape may be used instead of the suction handle. If all else fails, you can superglue the suction cup to the screen.

  • Lift the screen with the suction handle to create a small gap between the screen and the frame.

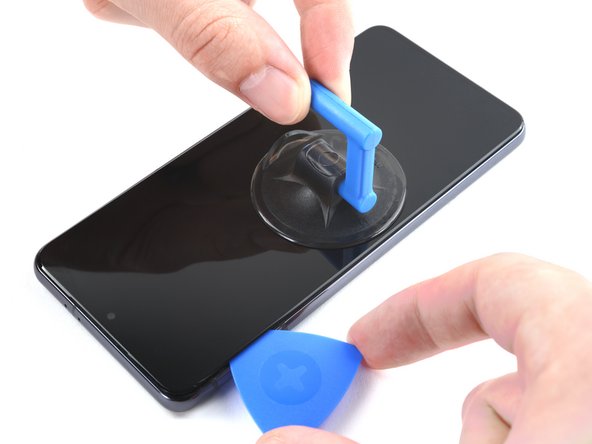
  • Insert an opening pick into the gap between the frame and the screen.

  • Slide the opening pick to the top left corner of the screen to slice its adhesive.

  • Only use the tip of the opening pick (4–5 mm) during this procedure to avoid tangling with the in-display fingerprint cable or accidentally tearing it.

  • Leave the opening pick in place to prevent the adhesive from resealing.

Una volta che lo schermo è caldo al tatto, applica una ventosa sul bordo sinistro dello schermo e il più vicino possibile al bordo.

Se lo schermo è gravemente incrinato, coprirlo con uno strato di nastro adesivo trasparente potrebbe permettere alla ventosa di aderire meglio. In alternativa, puoi usare del nastro molto resistente al posto della ventosa. Se tutto il resto fallisce, puoi incollare la ventosa allo schermo con della supercolla.

Solleva lo schermo con la ventosa per creare un piccolo spazio tra lo schermo e il telaio.

Inserisci un plettro di apertura nello spazio tra il telaio e lo schermo.

Fai scorrere il plettro di apertura fino all'angolo in alto a sinistra dello schermo per separare l'adesivo.

Utilizza solo la punta del plettro (inserita massimo 4–5 mm all'interno) durante questa procedura per evitare di impigliarti con il cavo del sensore di impronte integrato nello schermo o di strapparlo accidentalmente.

Lascia il plettro di apertura in posizione per evitare che l'adesivo si riattacchi.

crwdns2944171:0crwdnd2944171:0crwdnd2944171:0crwdnd2944171:0crwdne2944171:0